
Final Fantasy 14: Mount Ordeals (Normal) Trial Guide

Final Fantasy 14’s 6.3 update introduced the two last Archfiends from the Main Scenario Quests, and we get to duke it out against Rubicante in the newest trial, Mount Ordeals. Looking to take him on for the first time, or not sure what his moves do even after clearing it? Here’s a guide to all of Rubicante’s mechanics in Mount Ordeals (Normal).
As you may have guessed, this guide contains spoilers, so consider yourself warned. Each mechanic will have a screenshot to give you an idea of what it looks like if you haven’t done the fight just yet.
Final Fantasy 14: Mount Ordeals (Normal) Trial Guide
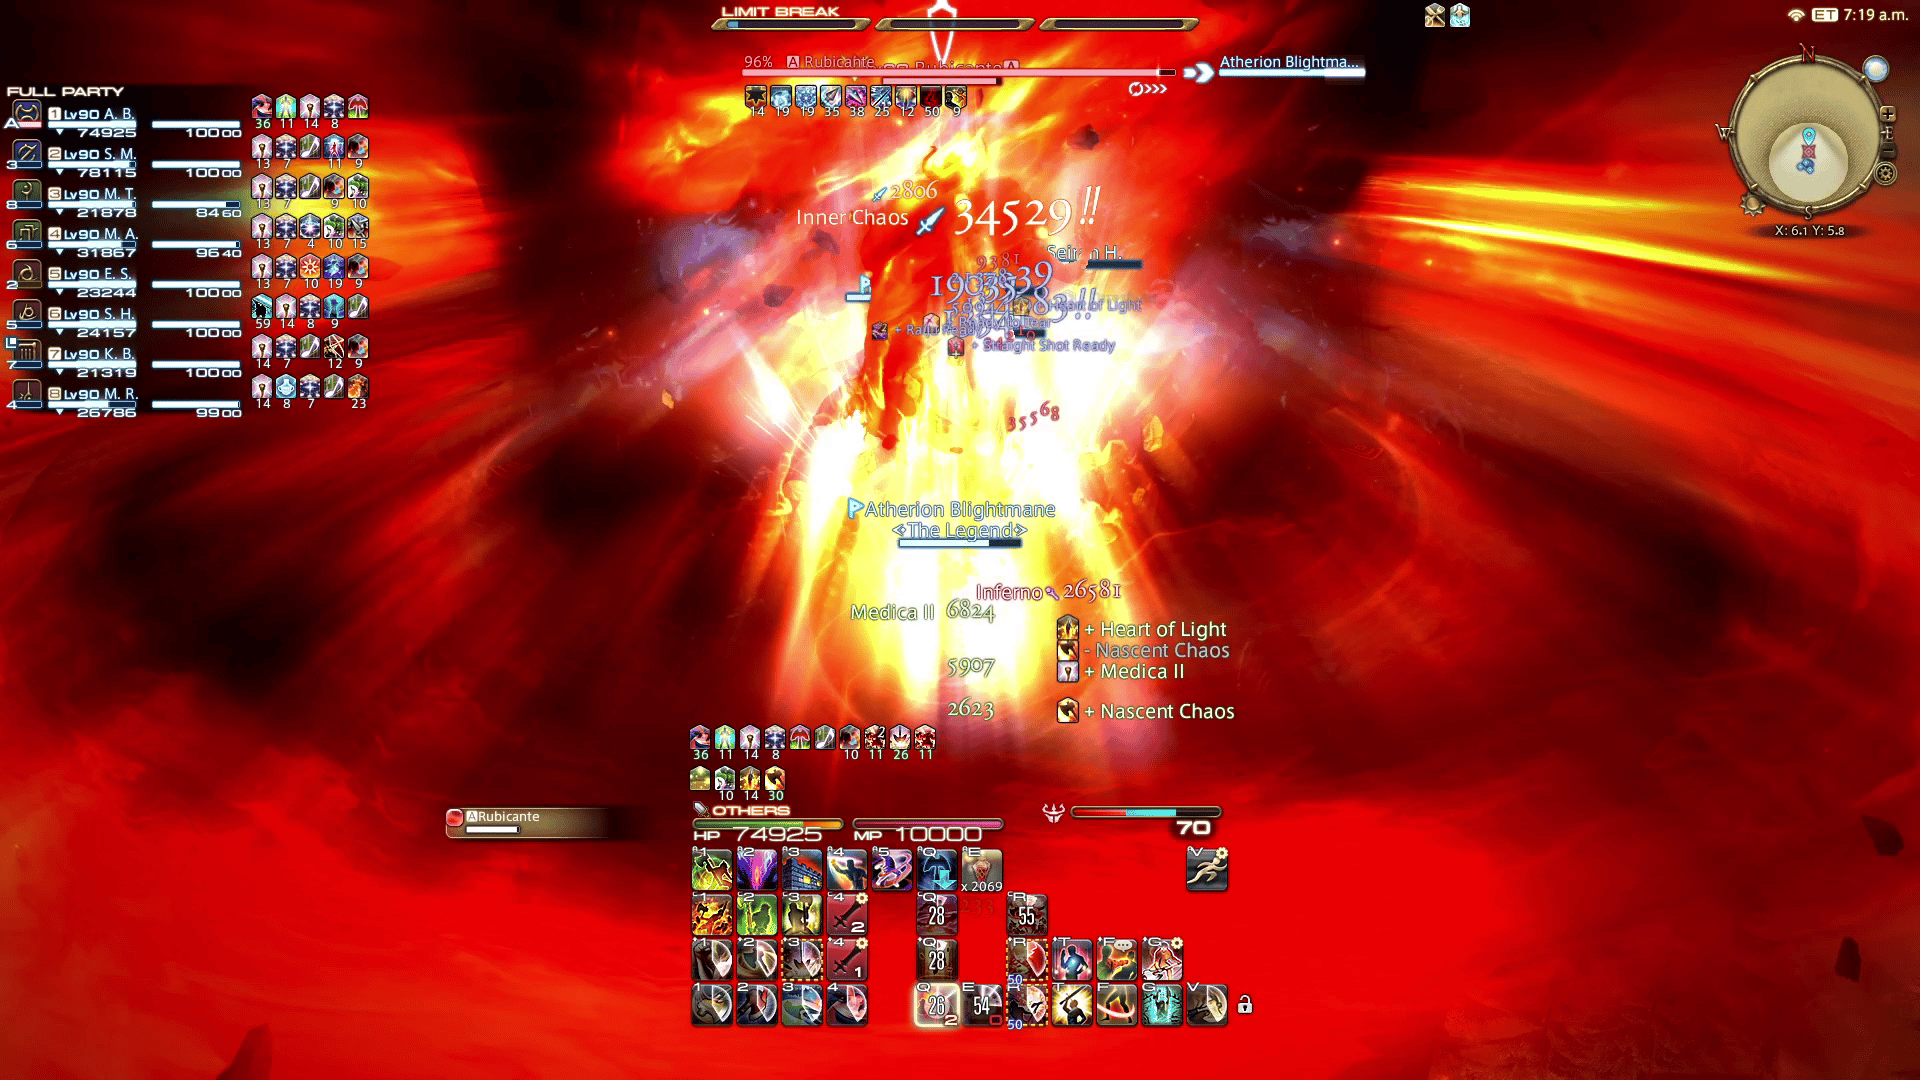
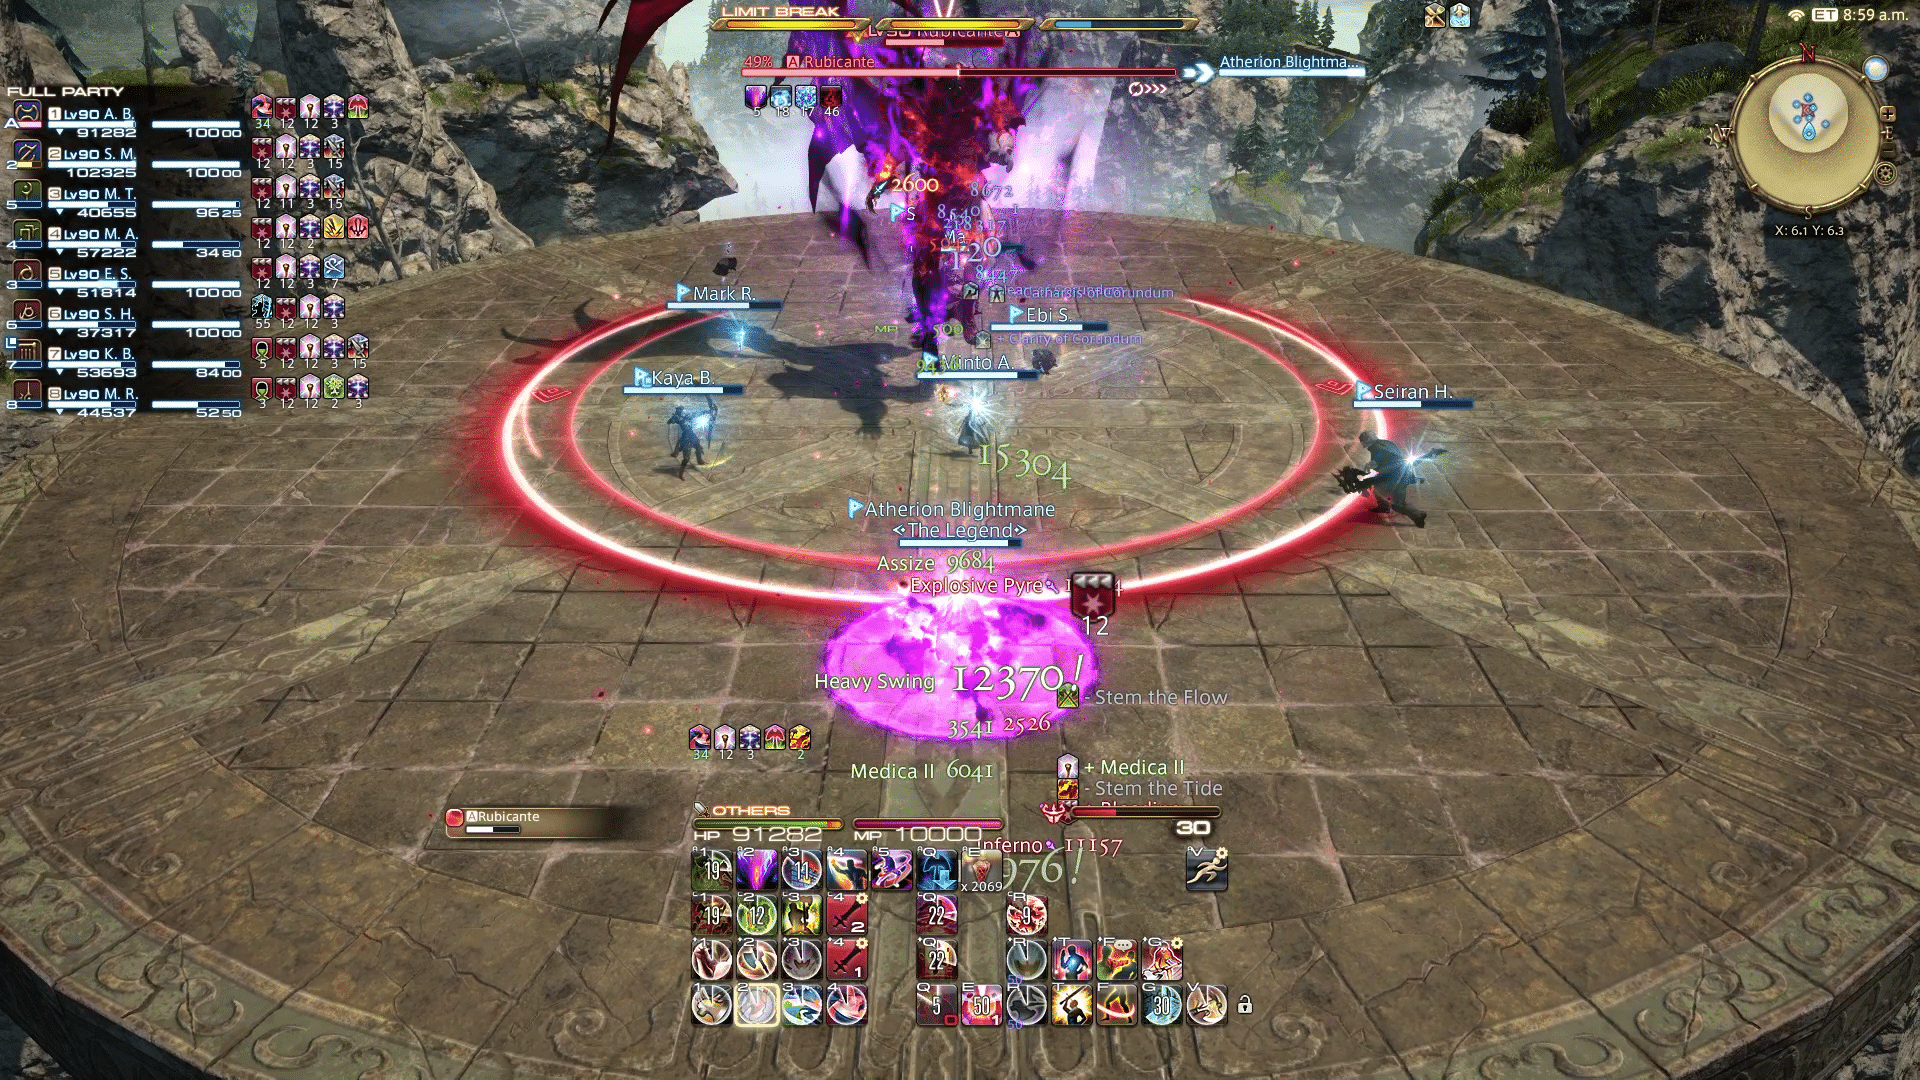
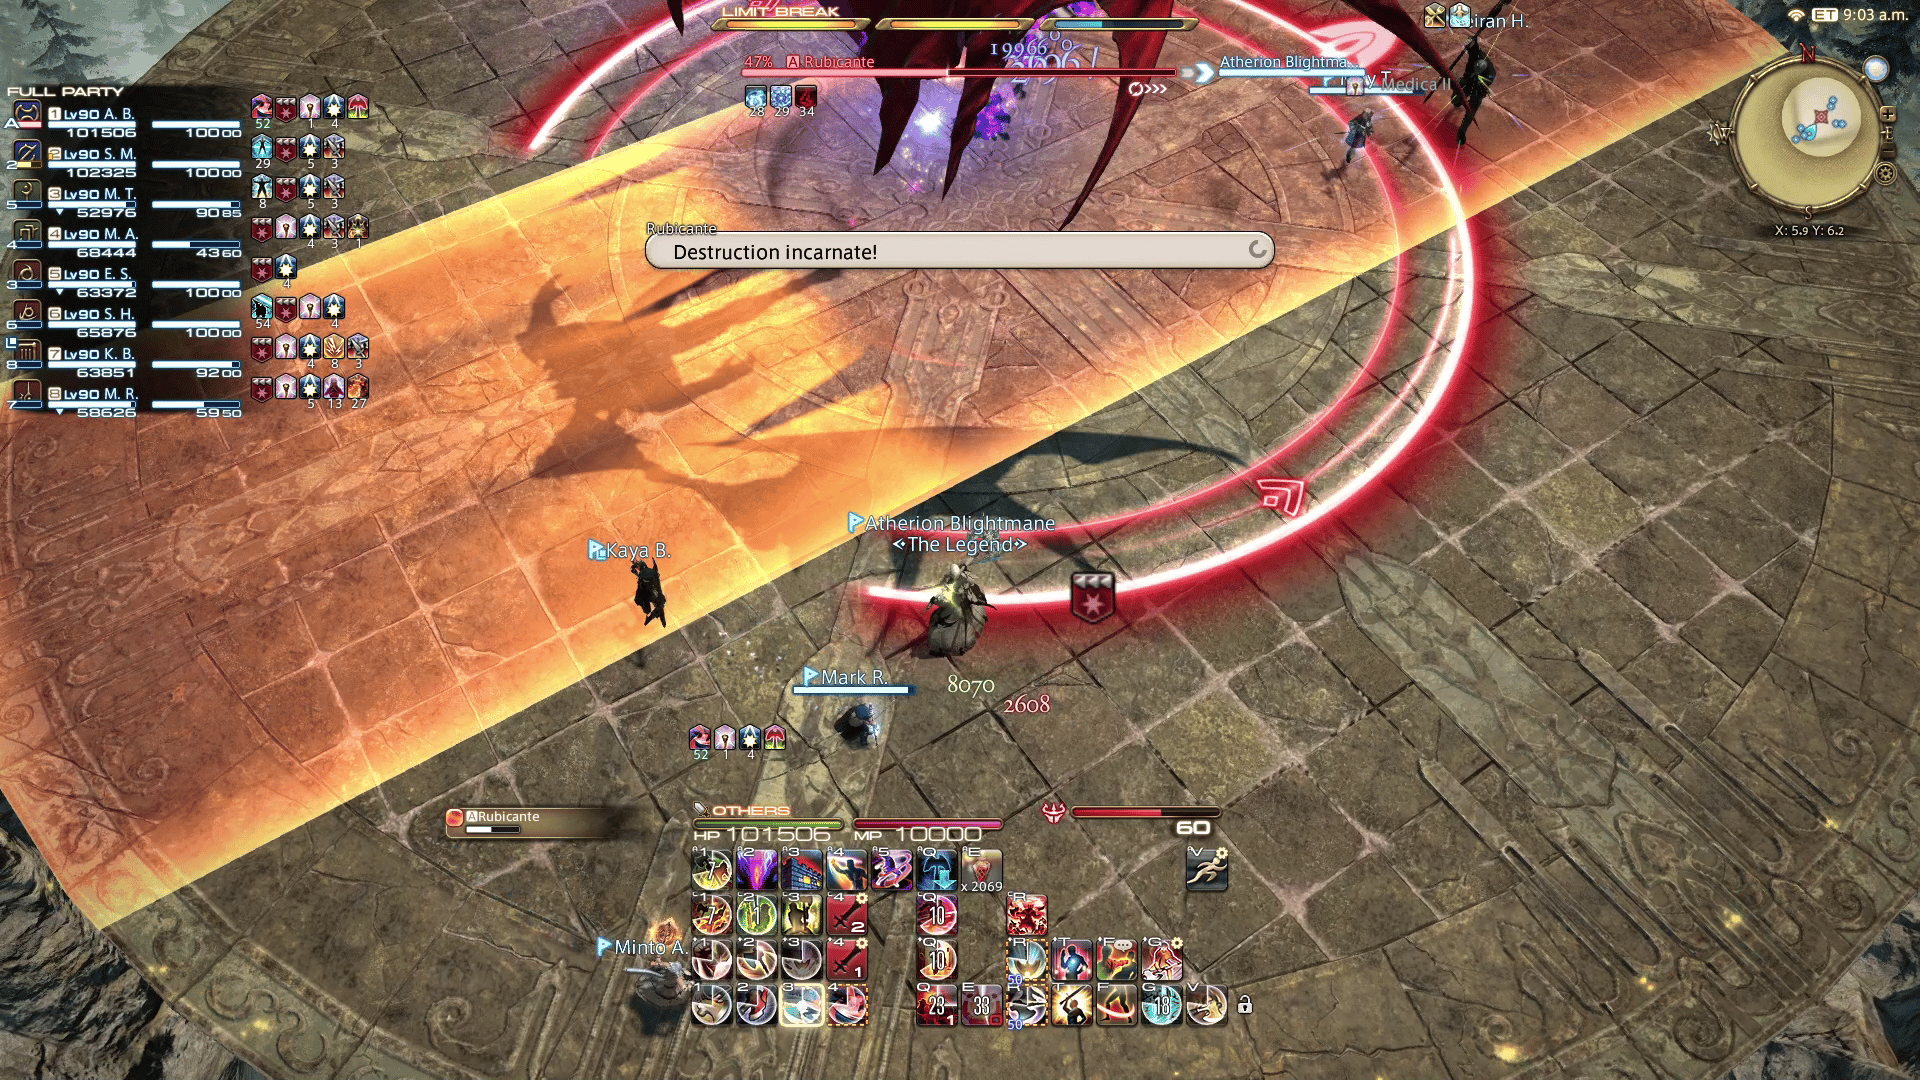
Inferno
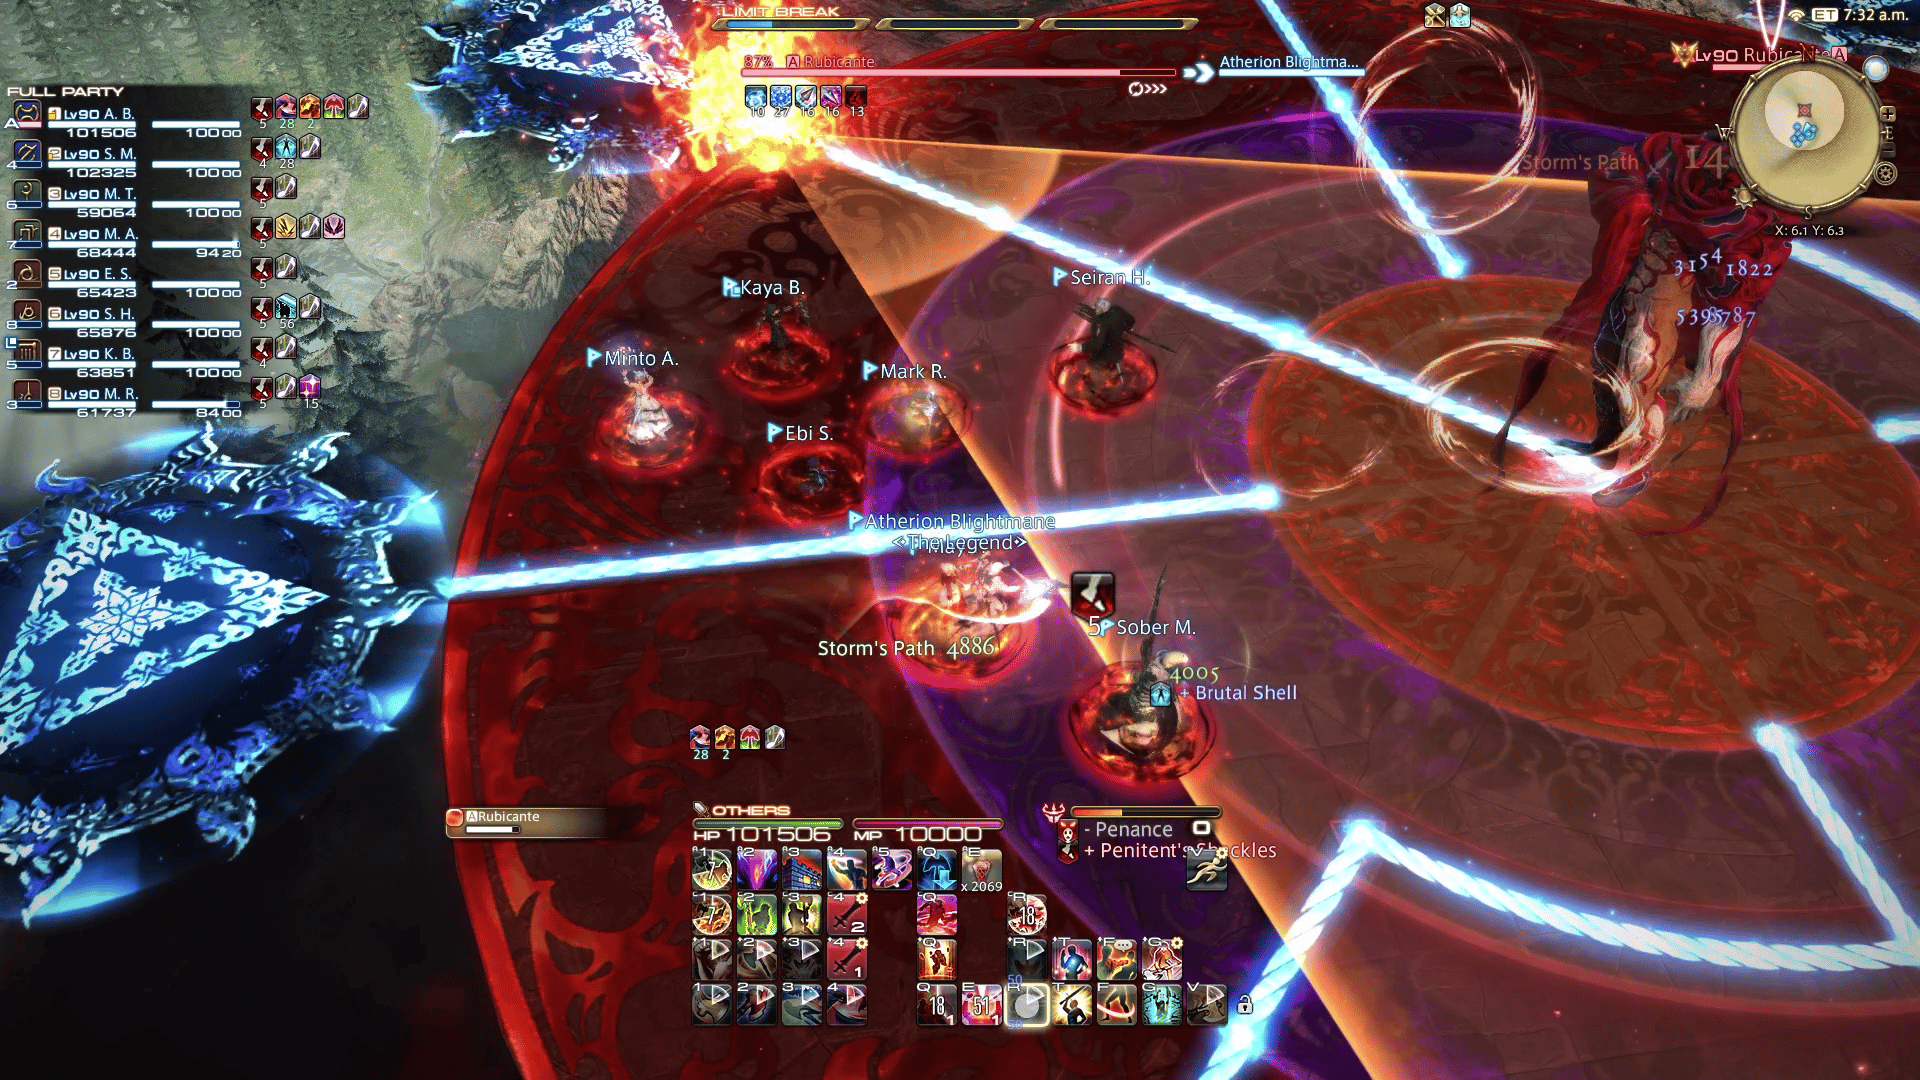
This attack does damage to the entire raid, but it’s a little different depending on whether it’s cast during the first or second phase. During the first phase, Inferno is a typical raidwide attack that does a sizeable chunk of damage. Heal, shield, and mitigate as necessary.
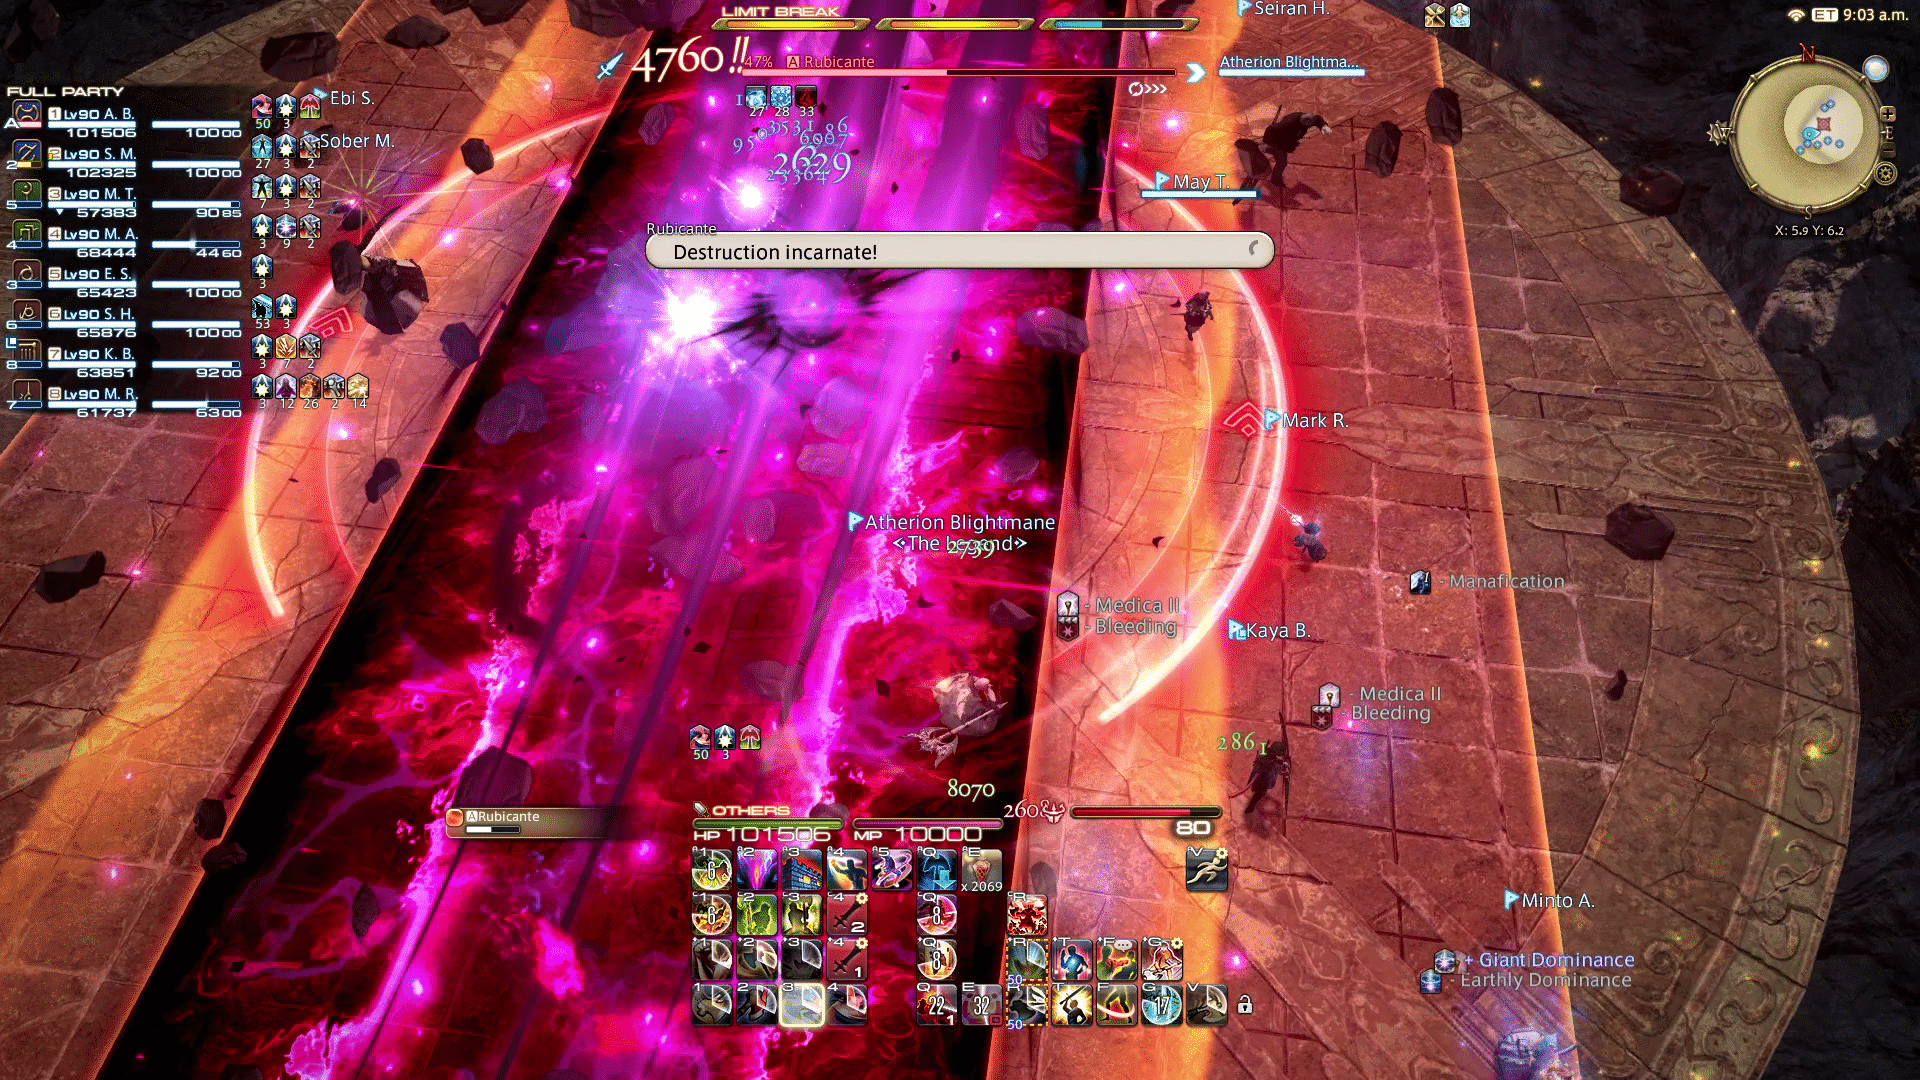
During the second phase, Inferno becomes a set of targeted AoEs on every player. Players must spread apart to avoid clipping each other. Healers should also note that this version of Inferno also leaves behind a DoT, so consider throwing in a bit of extra healing.
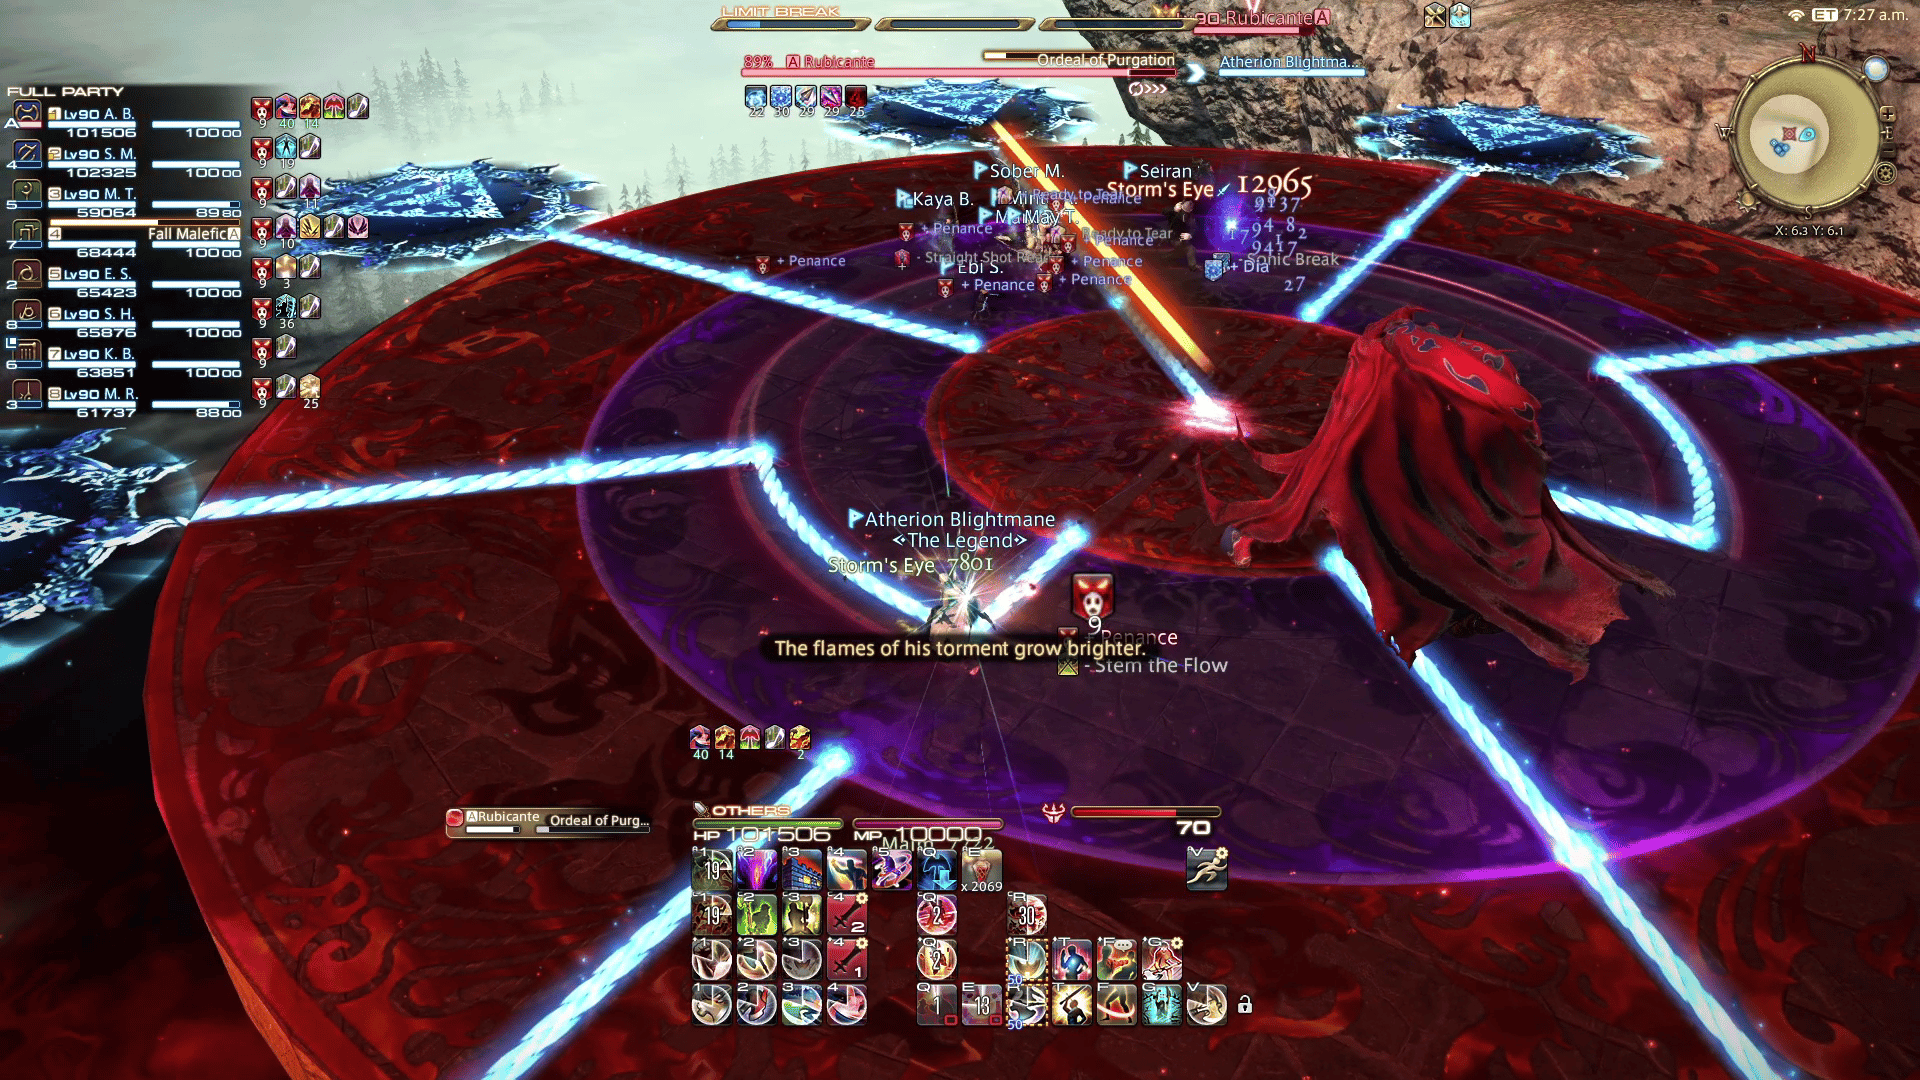
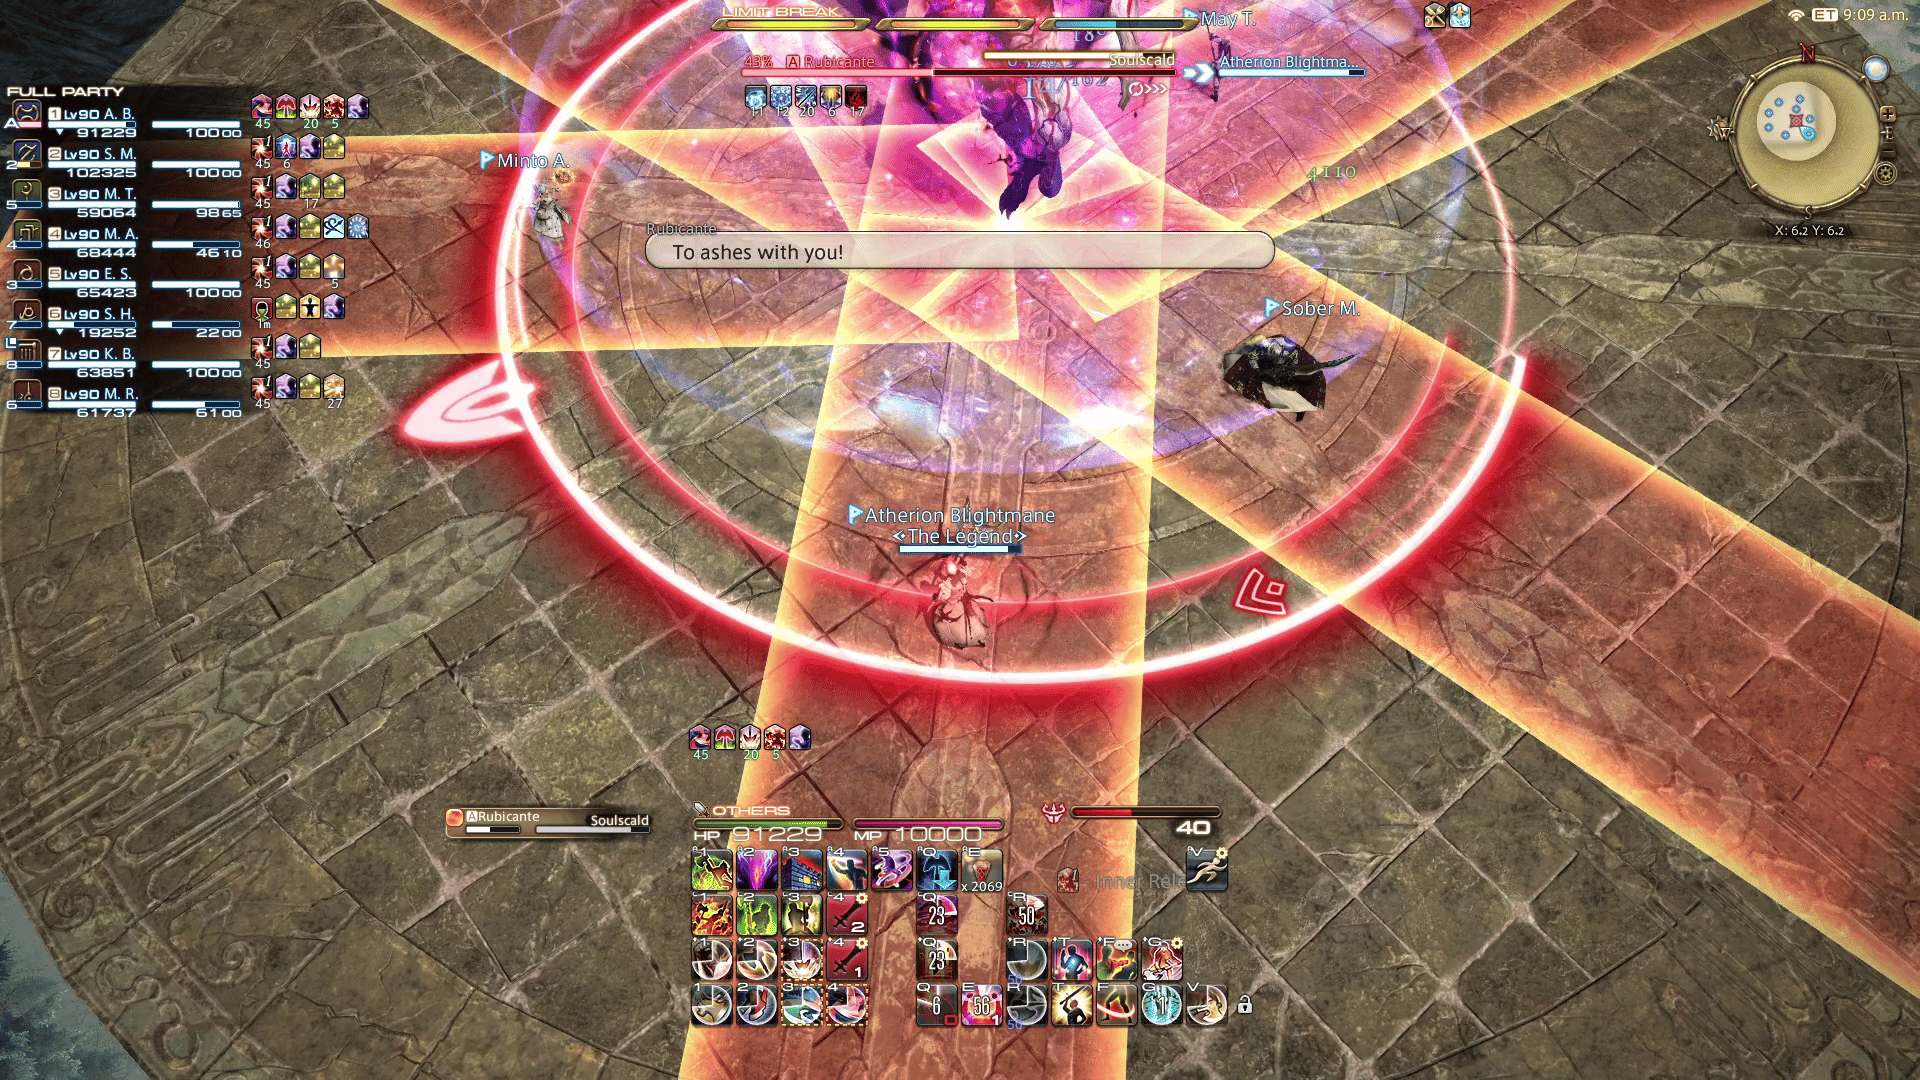
Ordeal of Purgation
This is Rubicante’s signature mechanic and the most difficult one you’ll have to deal with. Rubicante summons three discs that split the arena into three zones. Blue lines will also appear and run from Rubicante to eight symbols surrounding the arena. After the discs and symbols appear, Rubicante will begin casting Ordeal of Purgation as the line from the innermost circle begins to glow red. This glow flows through the line all the way to the connected symbol on the other side, and once the cast finishes, the symbol erupts in a triangular AoE.
During this mechanic, you will also receive a debuff with a countdown. Once this debuff reaches zero, you’ll be unable to move for eight seconds. During this time, the symbol will erupt, so you want to make sure you’re out of the symbol’s line of fire once the debuff expires.
If you’re playing a melee job, it is possible to maintain uptime while dodging the AoE. One method I personally found helpful when guessing the size of the AoE was by looking at the hitbox. You’ll notice in the picture below that the triangle covers just about the entire hitbox of Rubicante, so all you have to do is stay outside of the hitbox and around 1 fuse line away from the active symbol, and you’re pretty much safe.
From the second instance of this mechanic and beyond, the middle circle will rotate by one position before the fire travels down the line, changing its direction and potentially causing a different symbol to erupt than expected. The direction of the rotation is random, so you’ll have to be prepared for clockwise and counterclockwise movements, but it will be indicated in advance by a series of moving arrows.
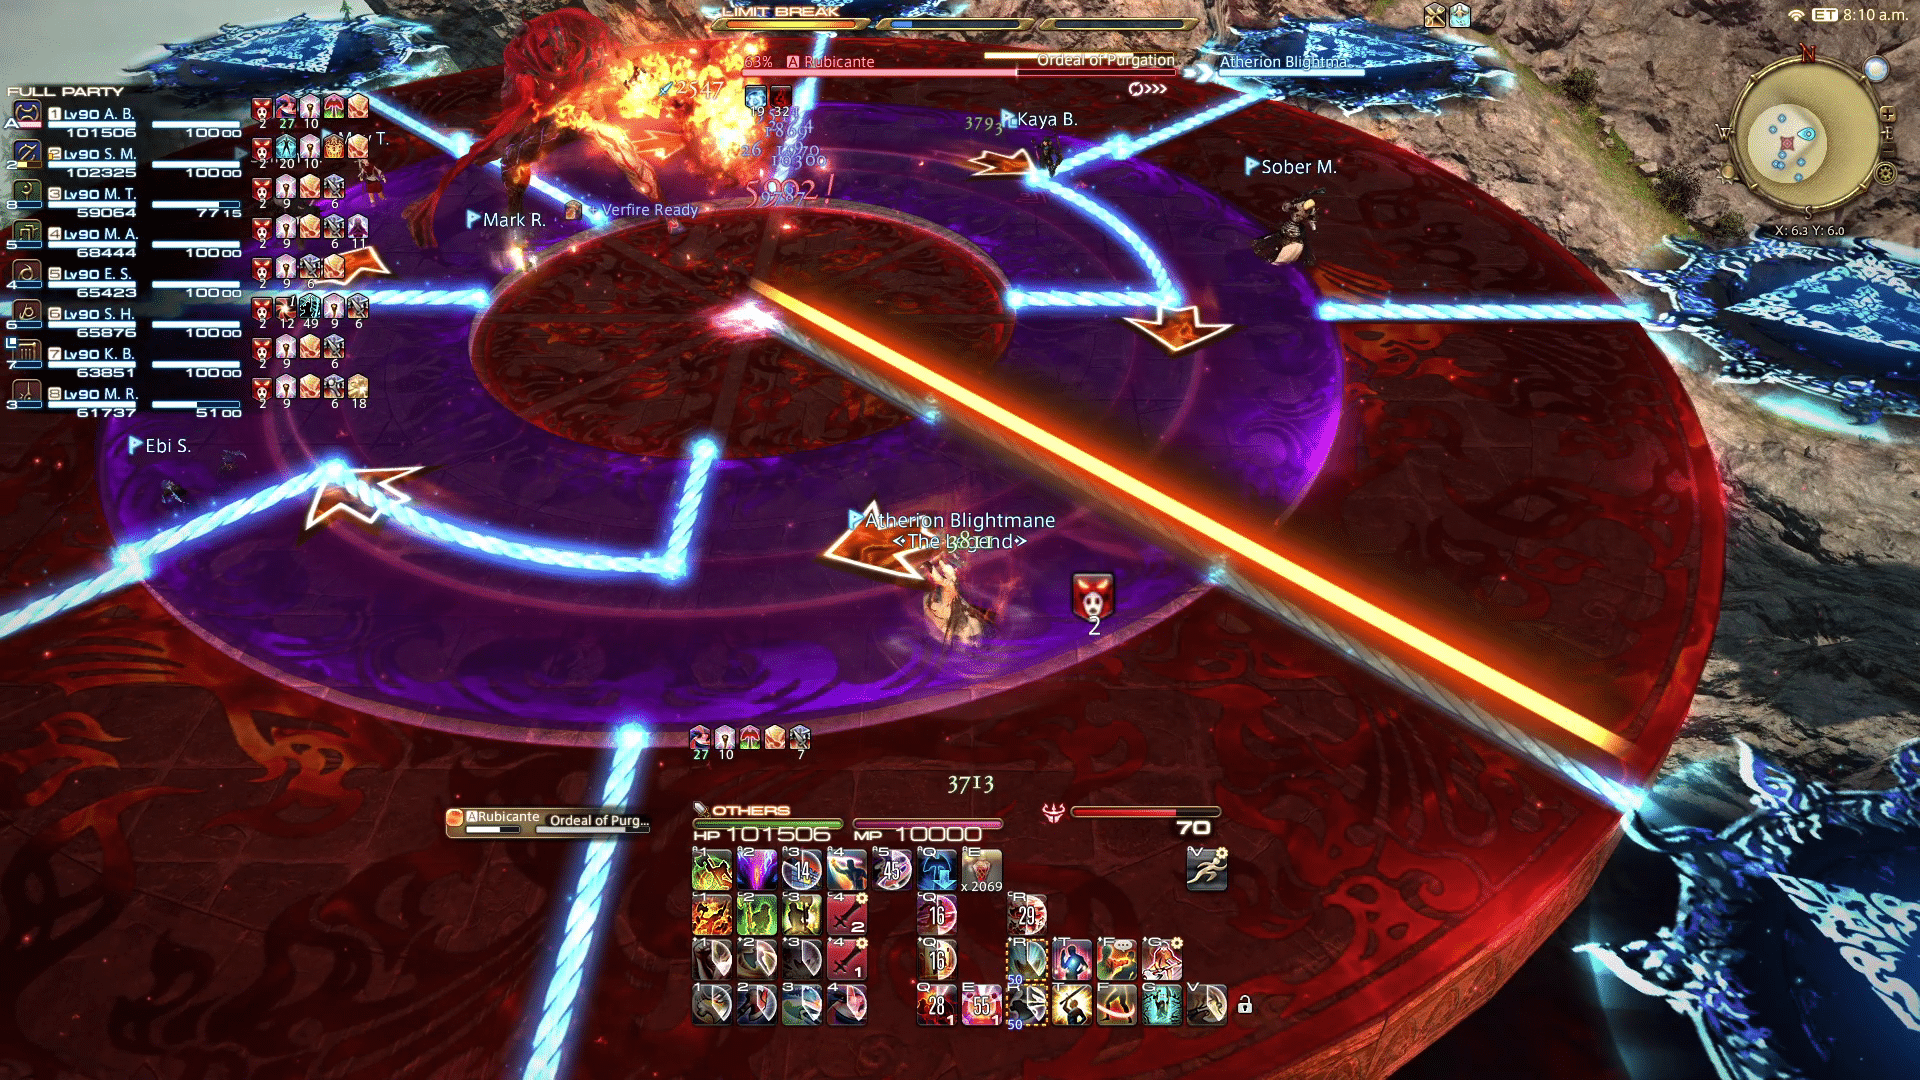
In the configuration above, the middle circle will rotate clockwise, which will cause the S-shaped middle segment to connect to the inner line instead of the straight one. This will cause the final eruption to effectively move one position counterclockwise. It’s sorta confusing until you try it out for yourself, but once you figure out the safe spots and how the lines work, the mechanic itself is quite simple.
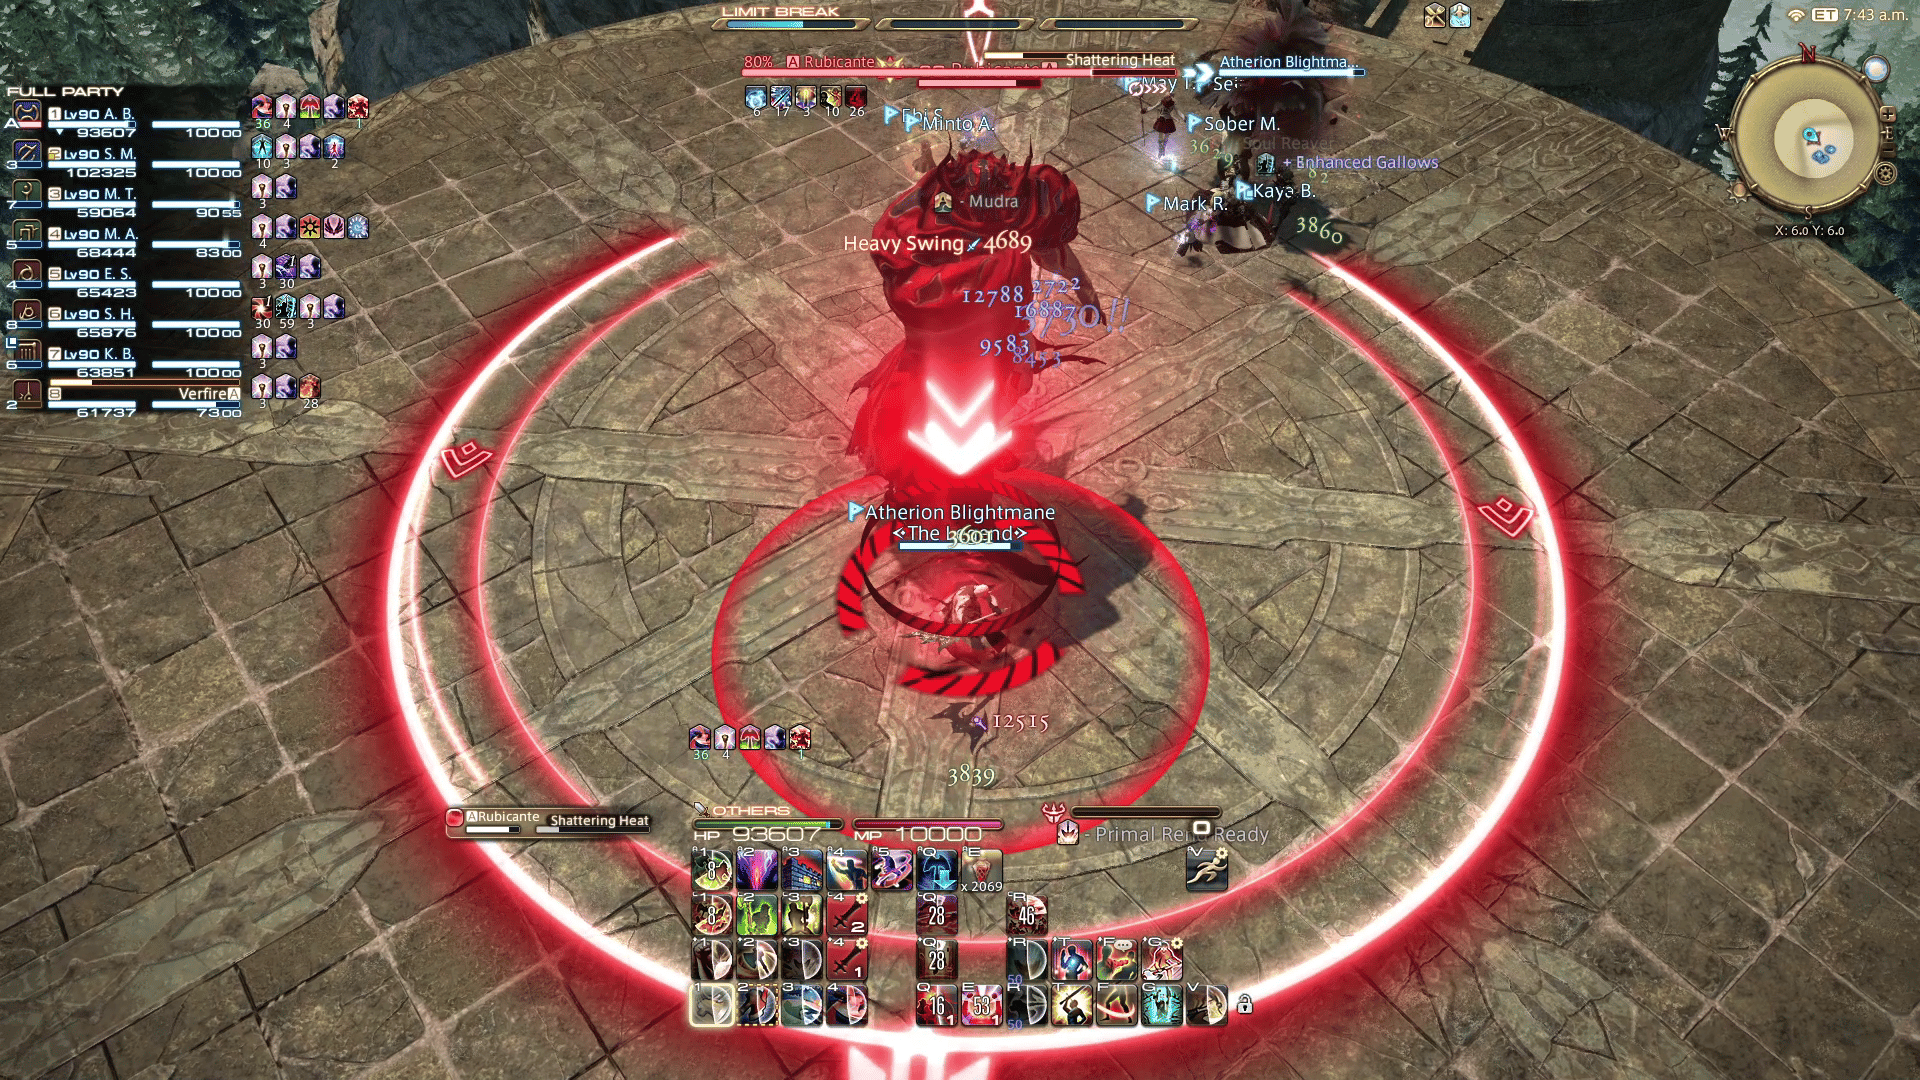
Shattering Heat
AoE tankbuster. Heal, shield, and mitigate as necessary. Players should avoid stacking with the tank as it does AoE damage.
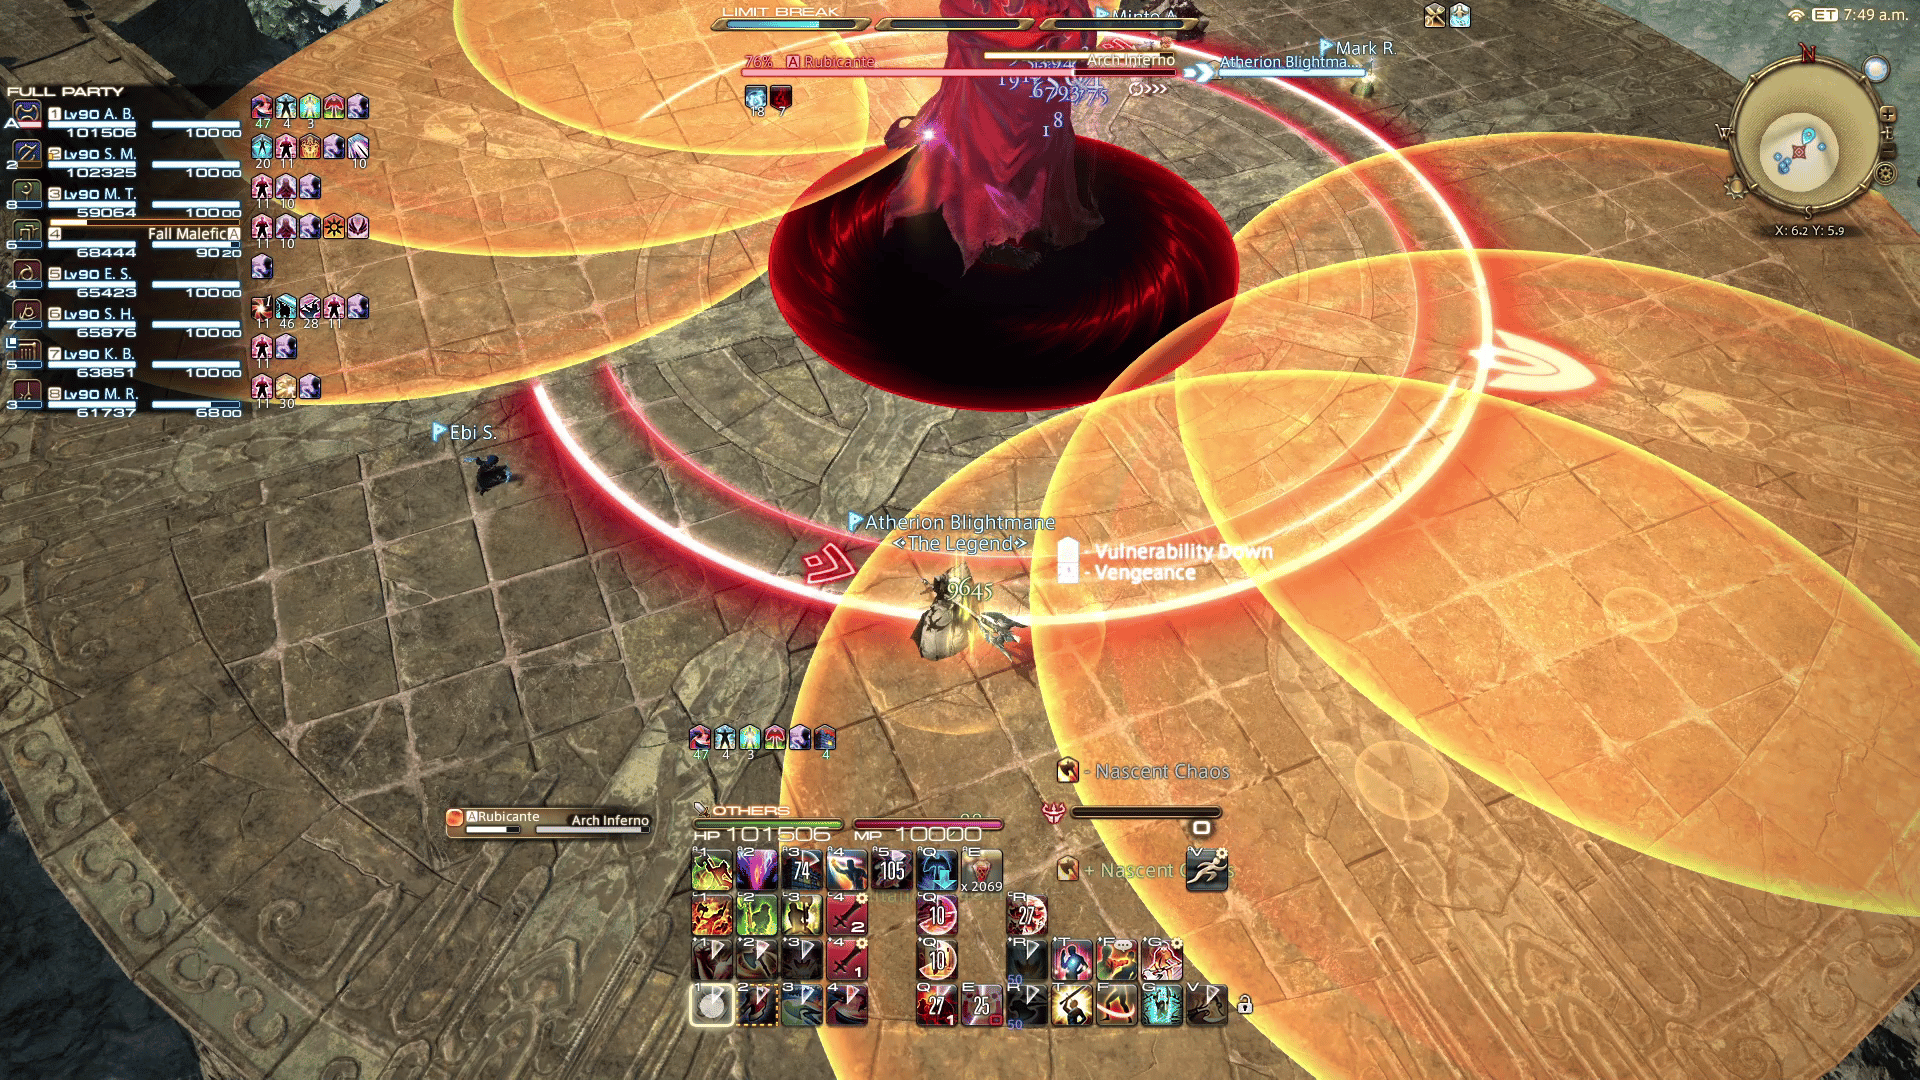
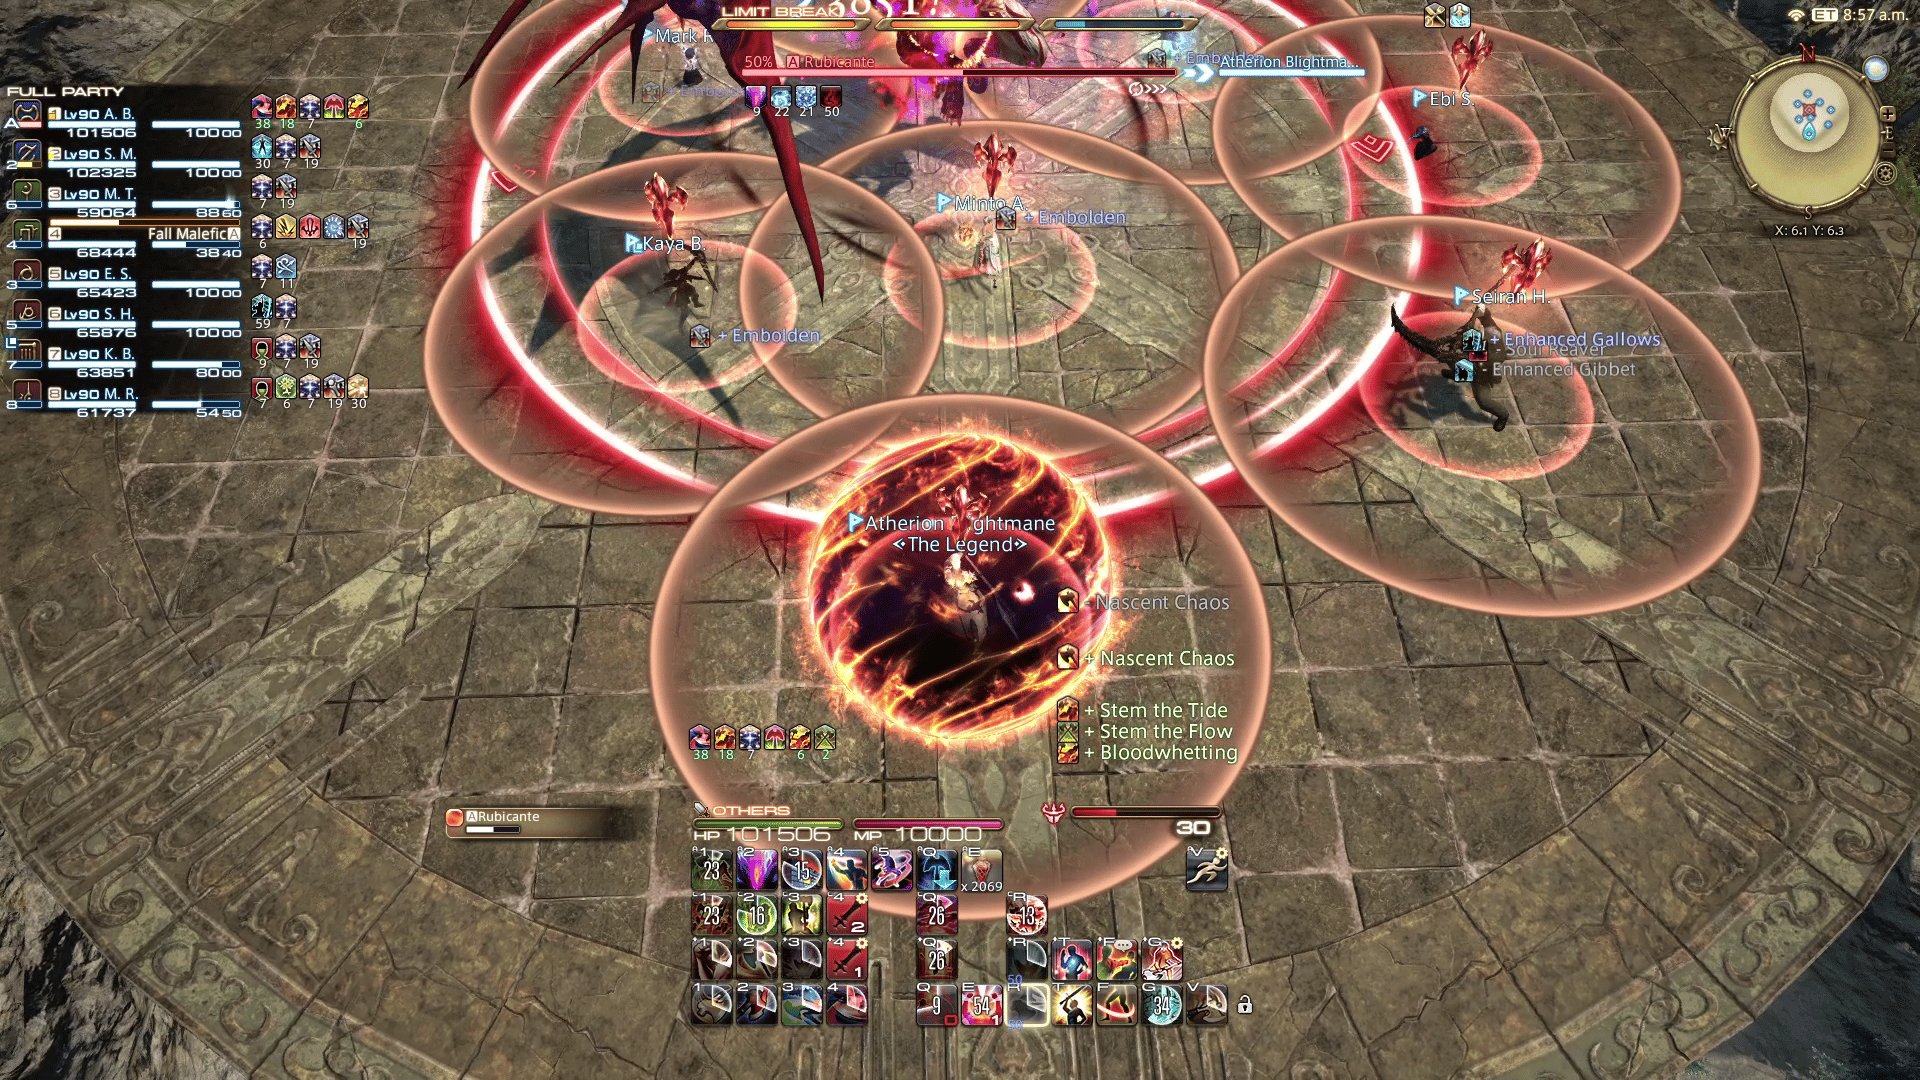
Arch Inferno
A series of circle AoEs that continuously spawn in a clockwise direction around Rubicante. The center area will also have an AoE, forcing players to keep moving as more and more AoEs go off.
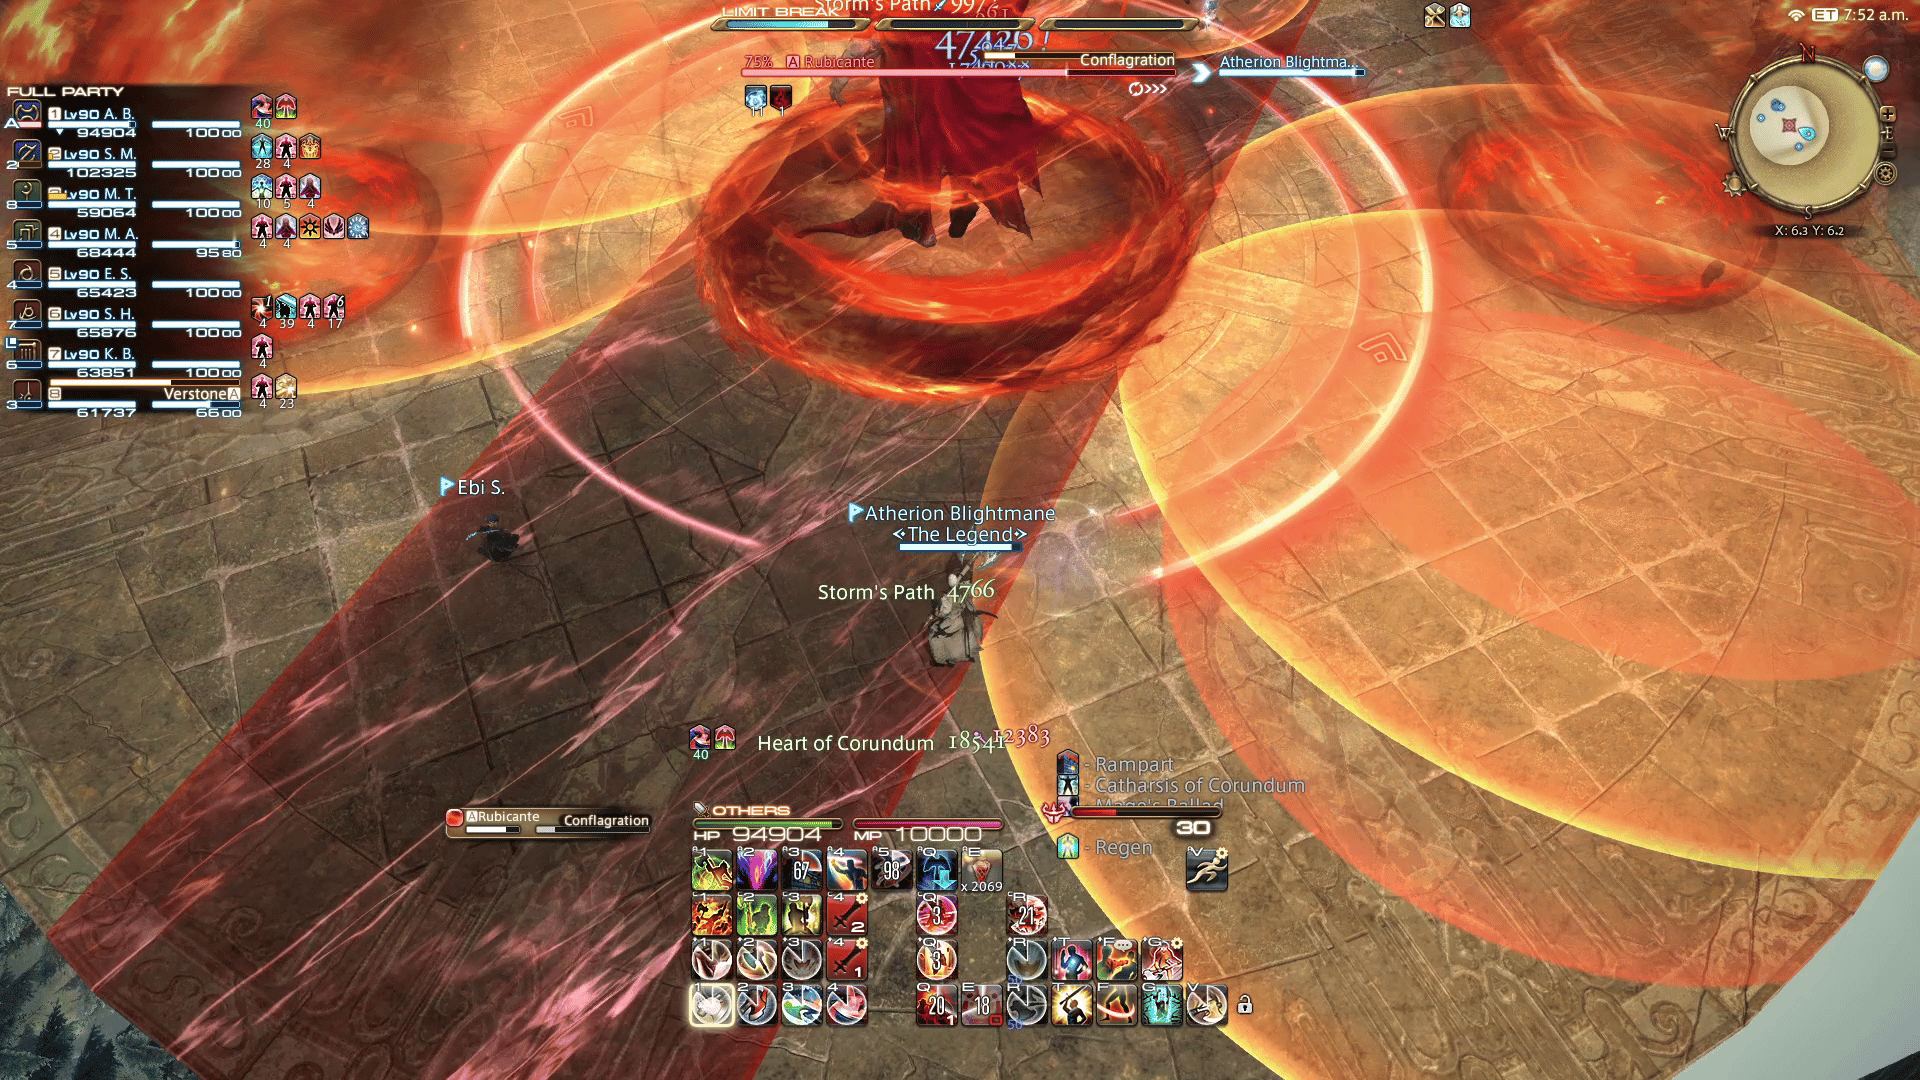
Conflagration
A line AoE that occurs during Arch Inferno. Simply dodge alongside the other AoEs. If you’re finding trouble keeping uptime as melee or finding a safe spot, note that the AoE damage occurs the moment the markers disappear, not when the animation plays out. This means that you can safely move into an AoE that just disappeared in the event that you can’t find any other place to move to.
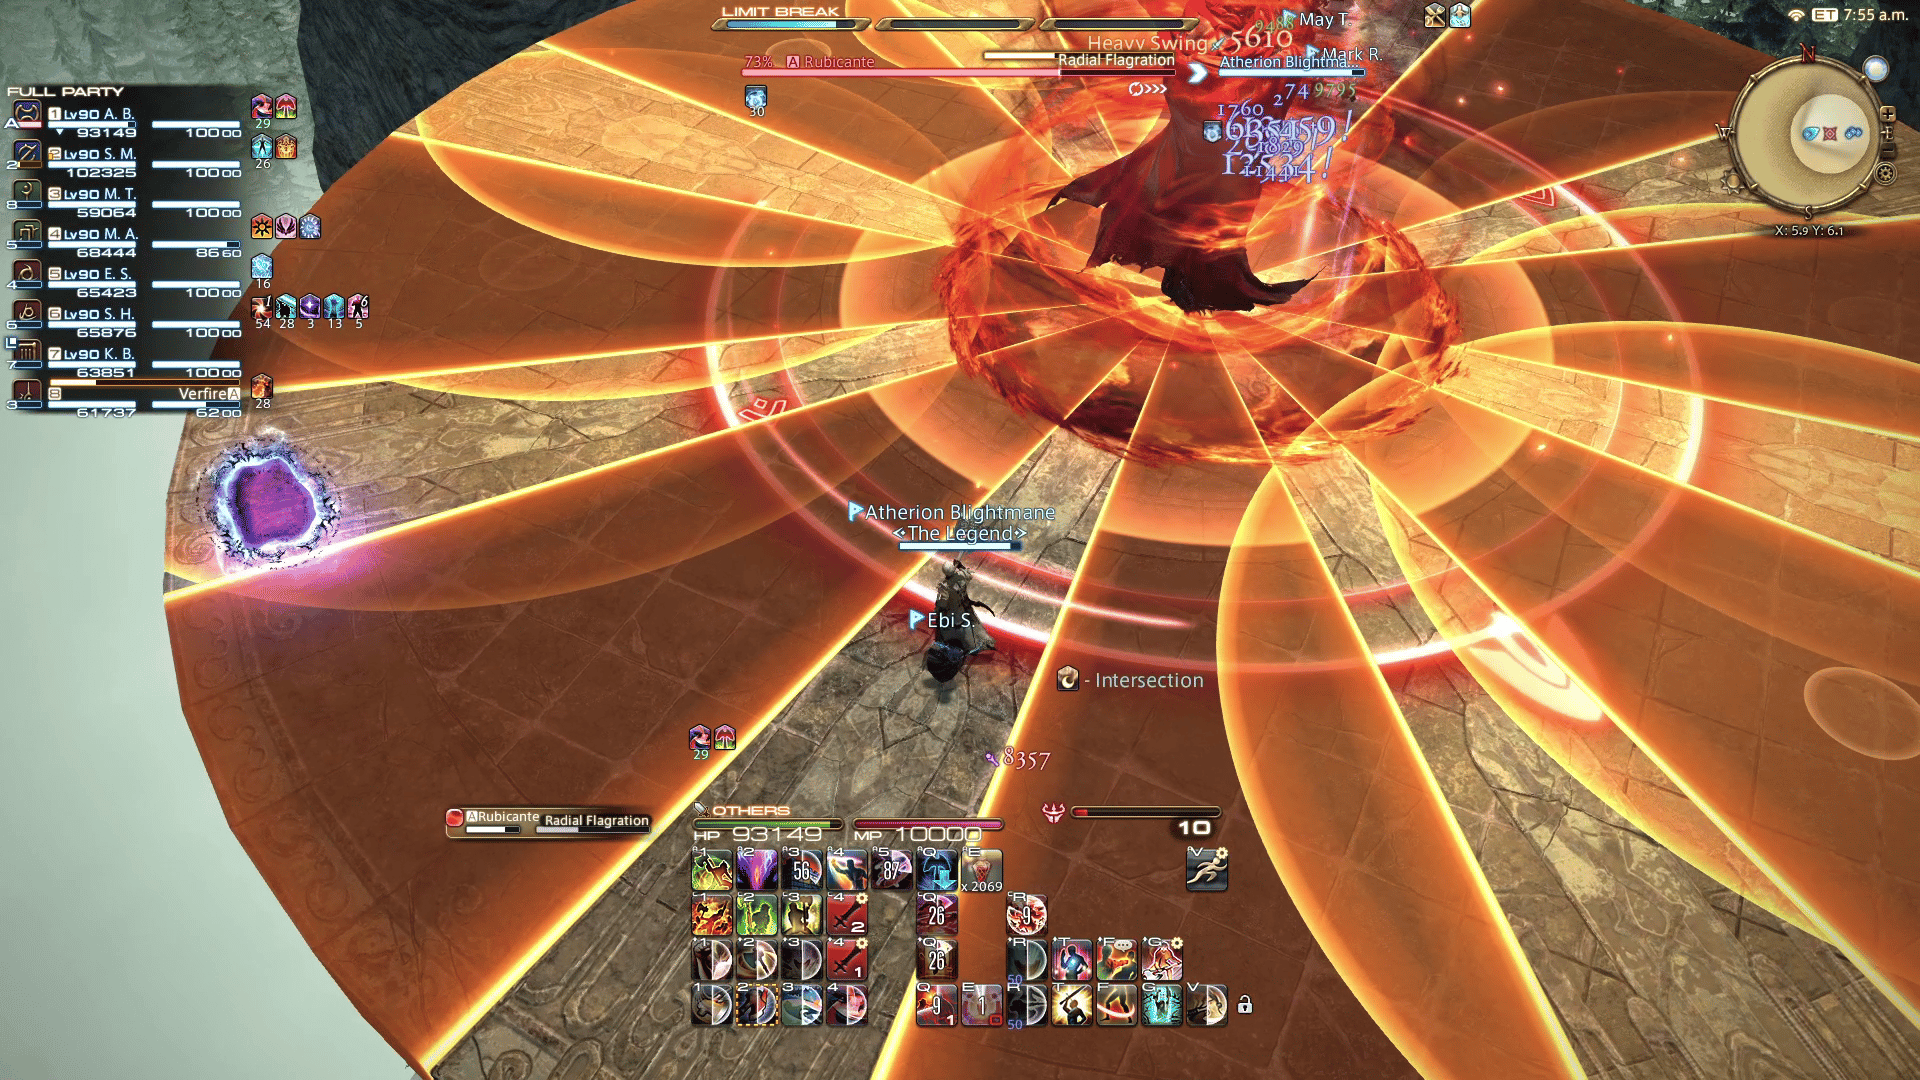
Radial Flagration
A series of triangle AoEs that occur during Arch Inferno. Simply dodge alongside the other AoEs. As with Conflagration and Arch Inferno, you can move into the where the markers where as soon as they disappear if you don’t have room to dodge.
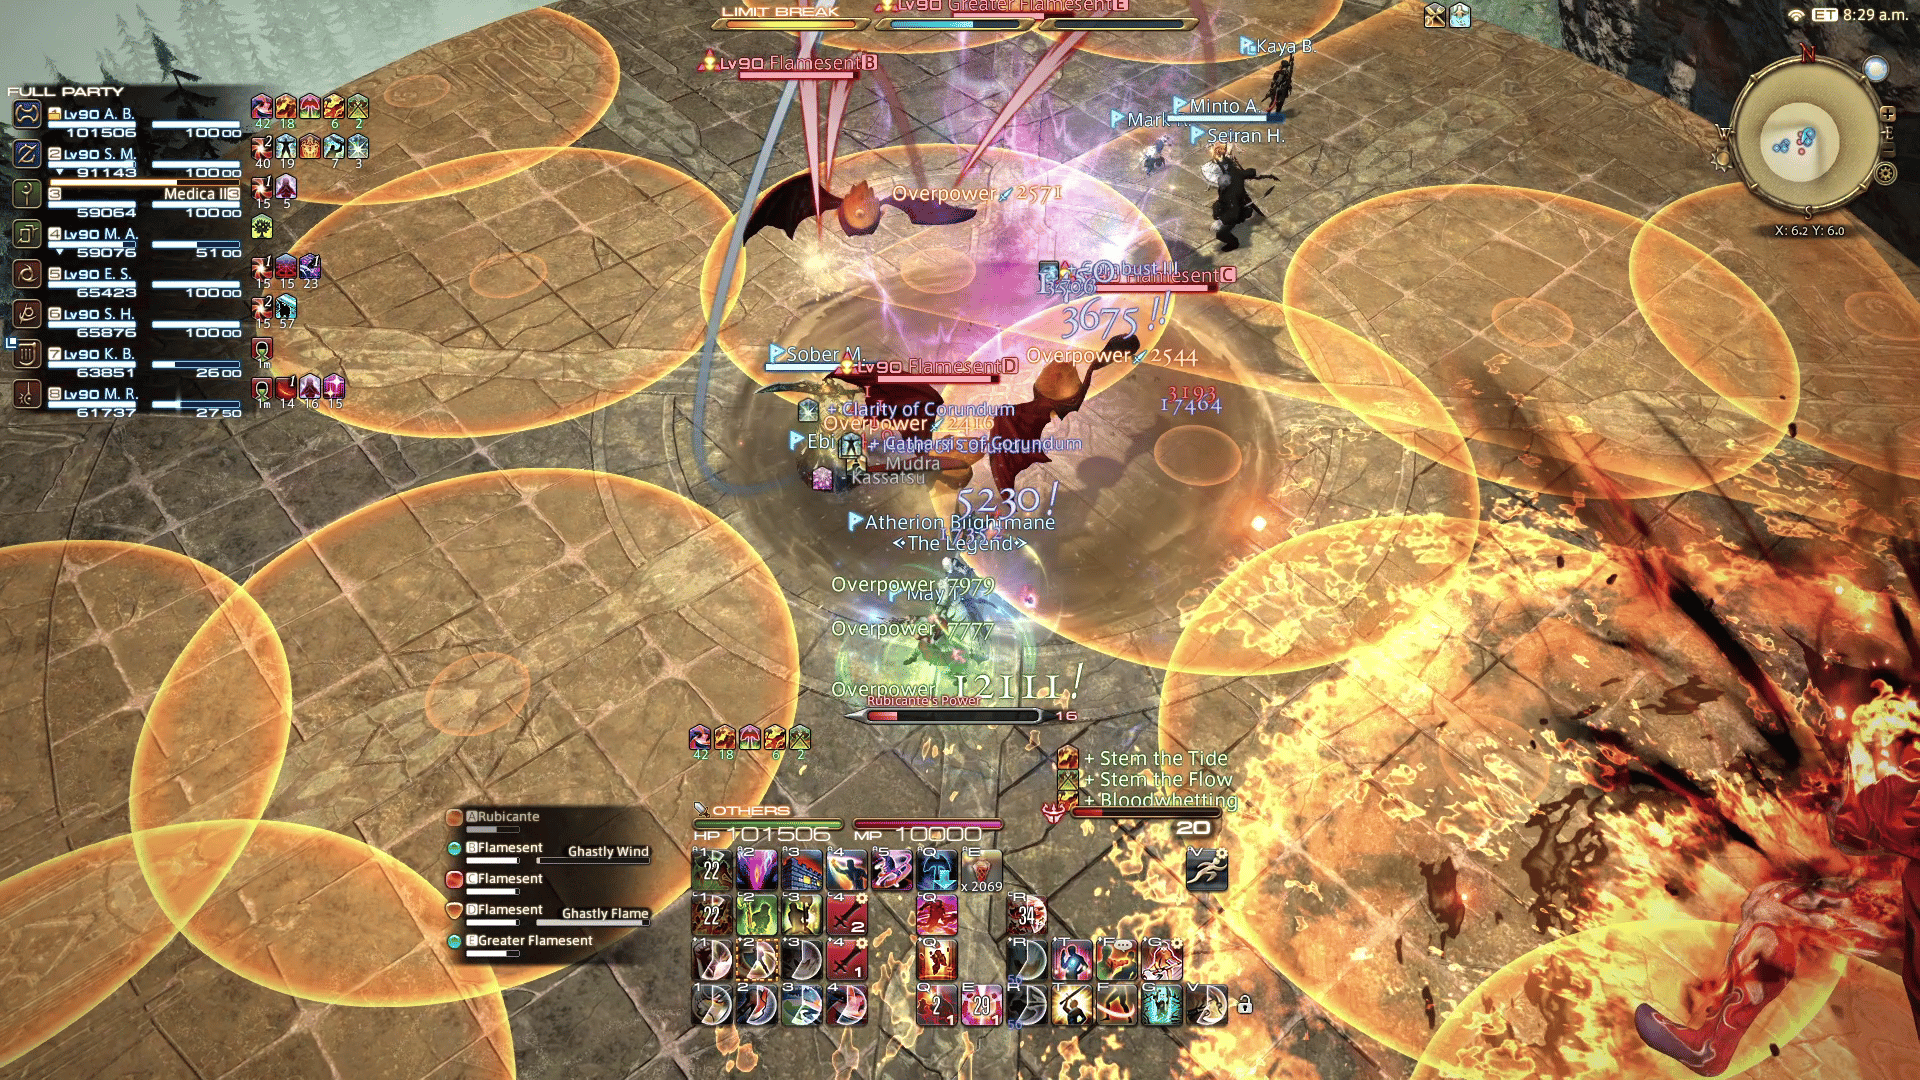
Adds Phase
Rubicante will become untargetable while four adds spawn around the arena. Players will have to dodge AoEs while killing the adds before Rubicante’s Power reaches 100 (as indicated by the duty bar). The main tank will also receive an AoE tankbuster during this phase, so stay away from them if you’re not the tank. You’ll want to kill the adds ASAP as you’ll also gain a stacking debuff the longer this phase lasts. After the adds are dead, Rubicante will deal raidwide damage and transform, thereby entering the second phase.
Second Phase Auto Attacks
Rubicante’s auto attacks during the second phase actually come in tiny AoEs. The main tank should not stack with the party and instead stay on the other side of the arena (which they should probably already be doing for melee positionals).

Flamerake
Rubicante summons rapidly spinning arrows that stop when the cast finishes. A set of line AoEs will then spawn in sequence going outwards based on the direction of the arrows. This mechanic is pretty fast and will be a test of your reflexes (heh). The moment the arrows stop, move away from where they’re pointing, as that’s where the first line AoE will appear.
Right after the marker of the first line AoE disappears, move into it immediately, as the second set of AoEs will follow up soon after. A third set will also occur on the edges of the arena, so you can’t just stand still there, either.
It looks like the arrows align with the eight line patterns found in the arena, so you can use that as reference when dodging. It will likely require a bit of time to get used to, just like Ordeal of Purgation, but this mechanic demands better reaction time.
Soulscald
Rubicante fires eight targeted line AoEs toward each player. Players must spread out to avoid clipping each other. Once the AoEs go off, eight shadows will travel out of Rubicante.
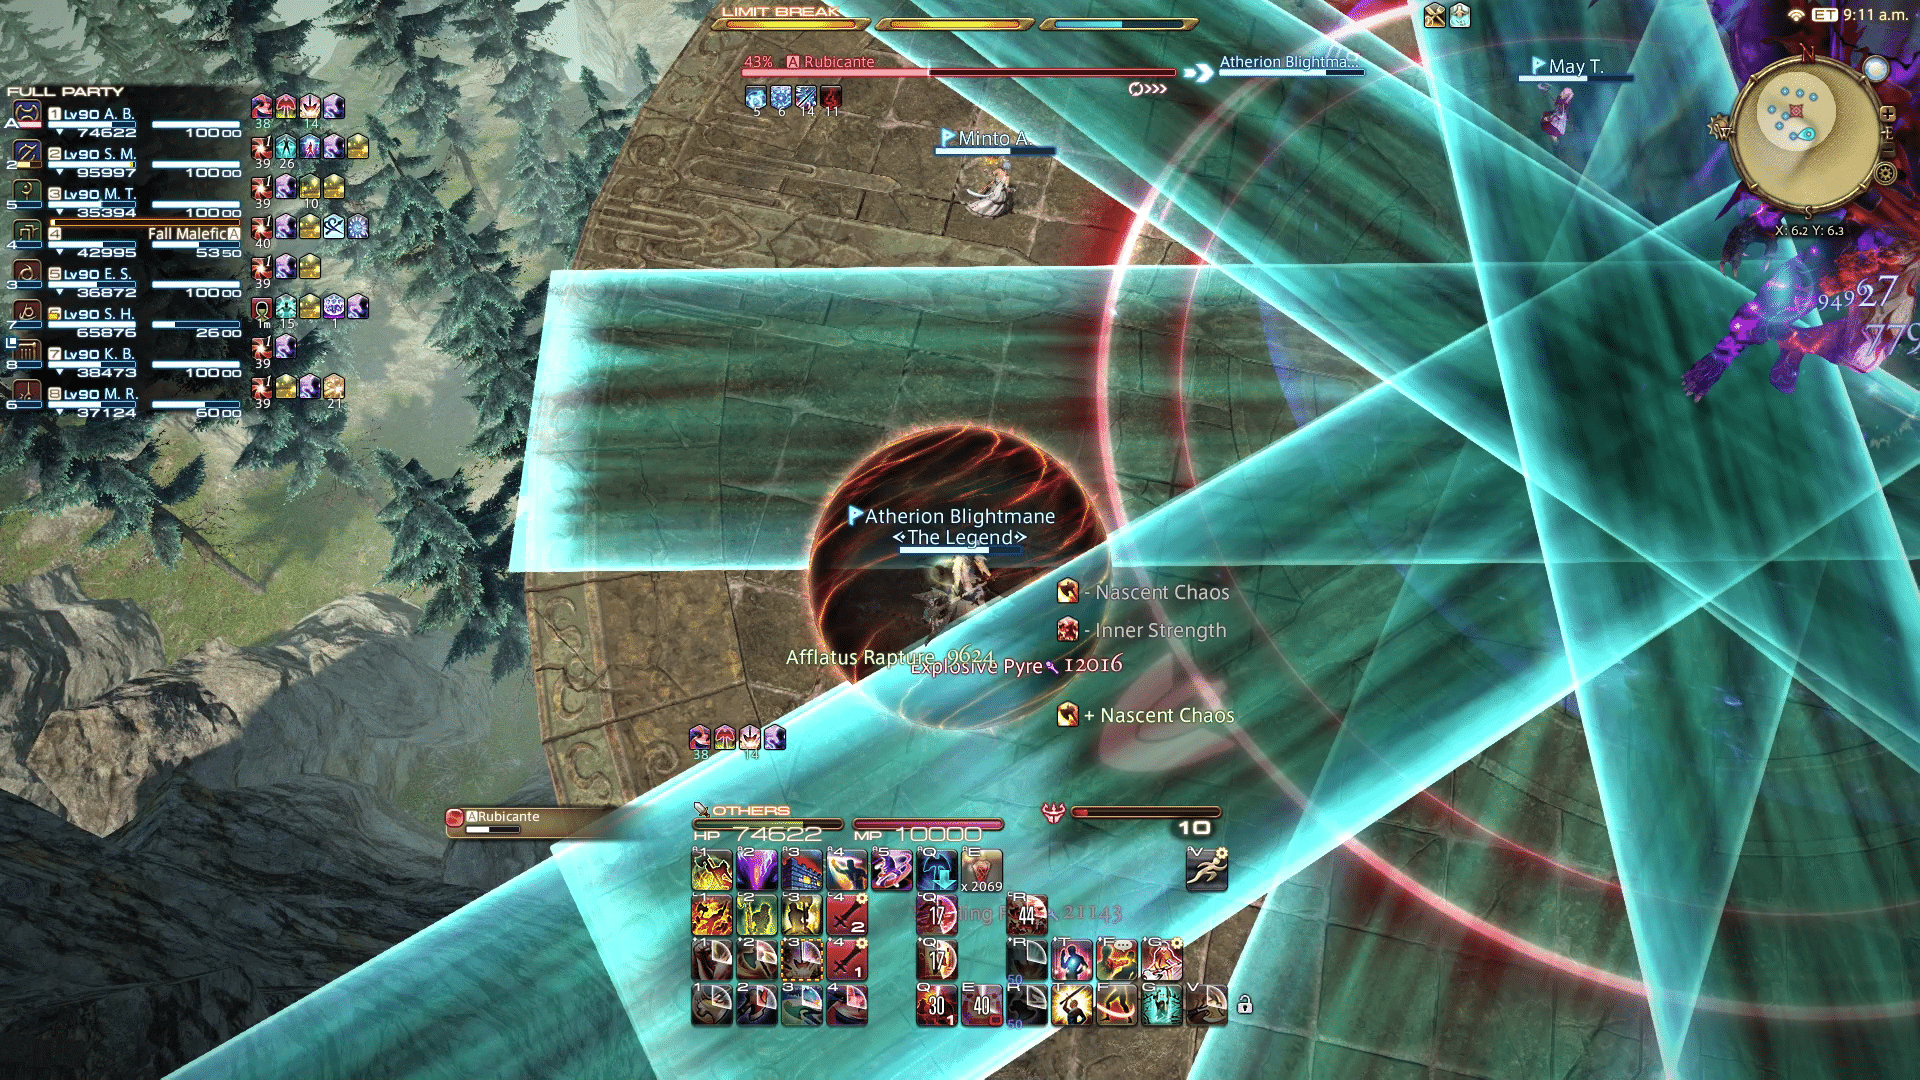
After a delay, the shadows will return from outside the arena and pass through Rubicante to the opposite side, with blue AoE markers indicating their travel paths. Simply move out of these markers and you’re good.
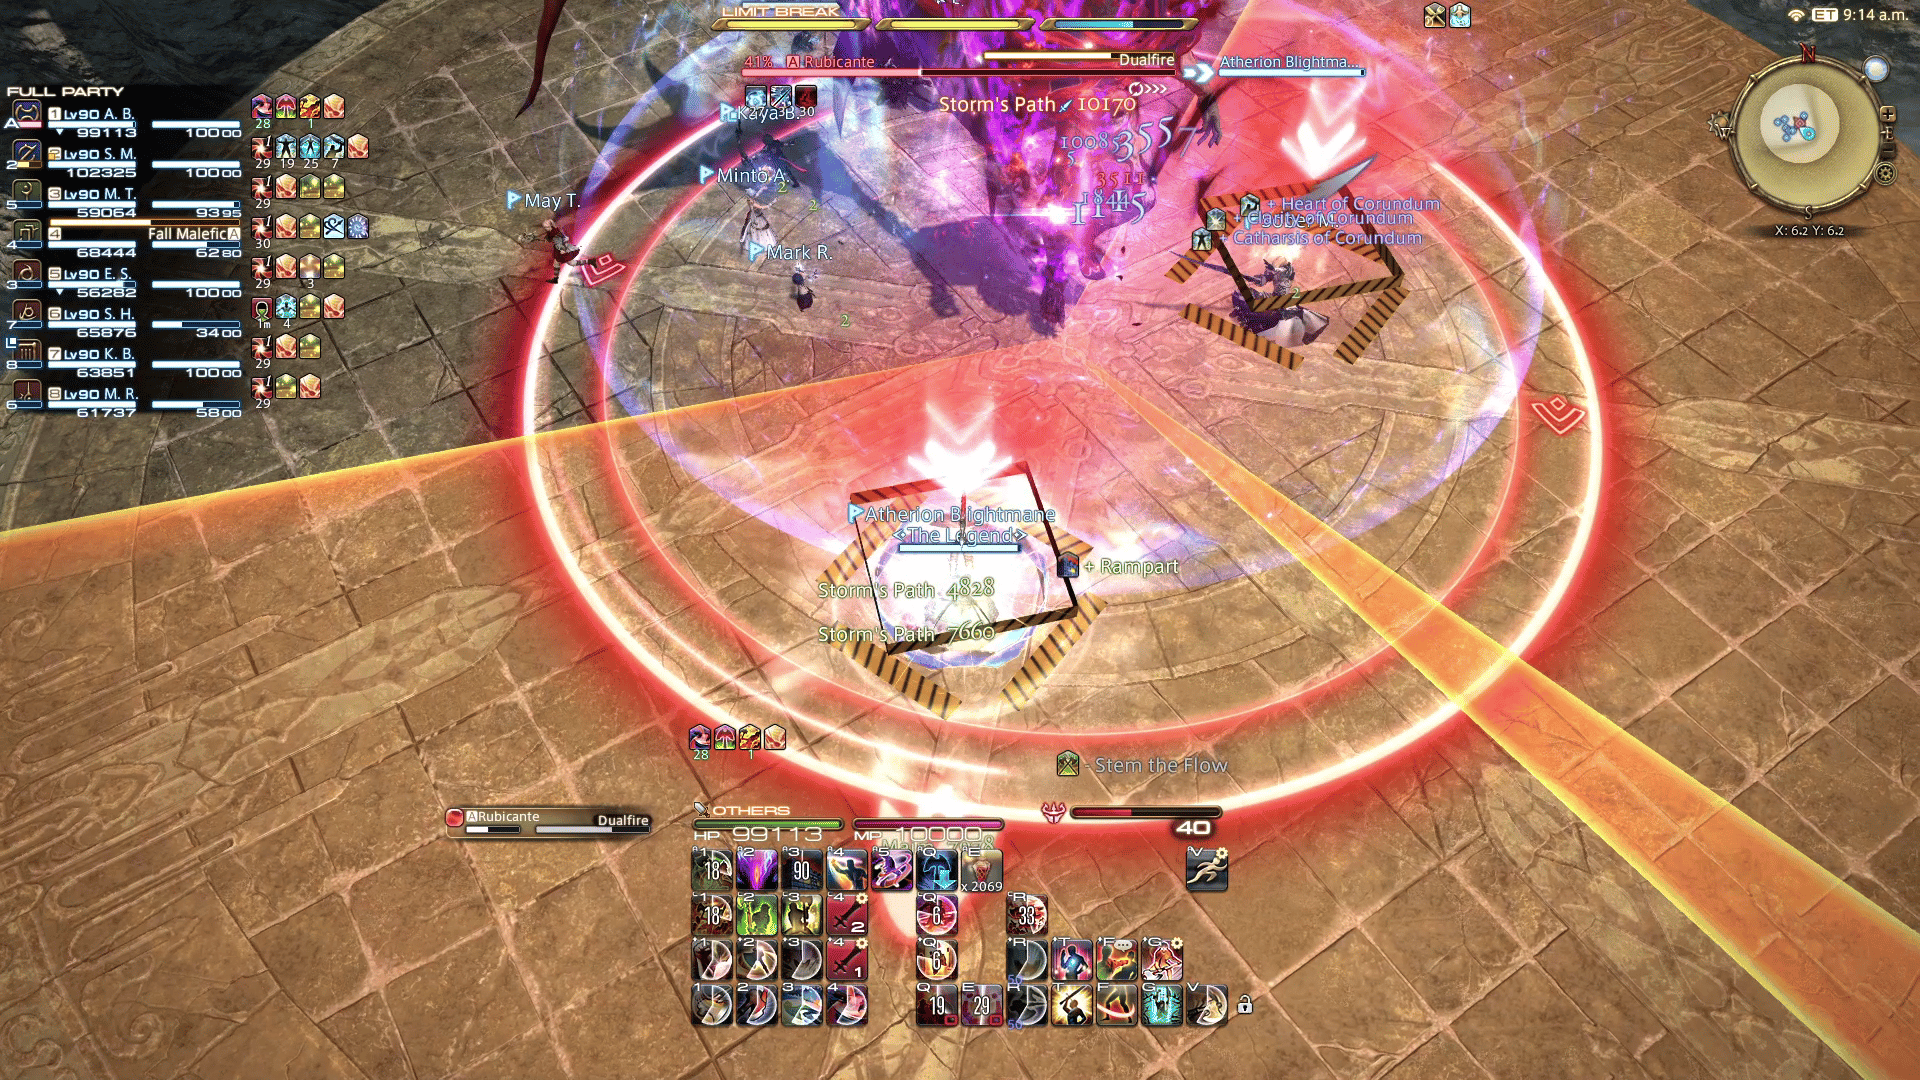
Dualfire
A dual cone-shaped tankbuster with wide coverage. Each tank will have to occupy about a third of the arena each while the rest of the party stacks together in the safe zone.
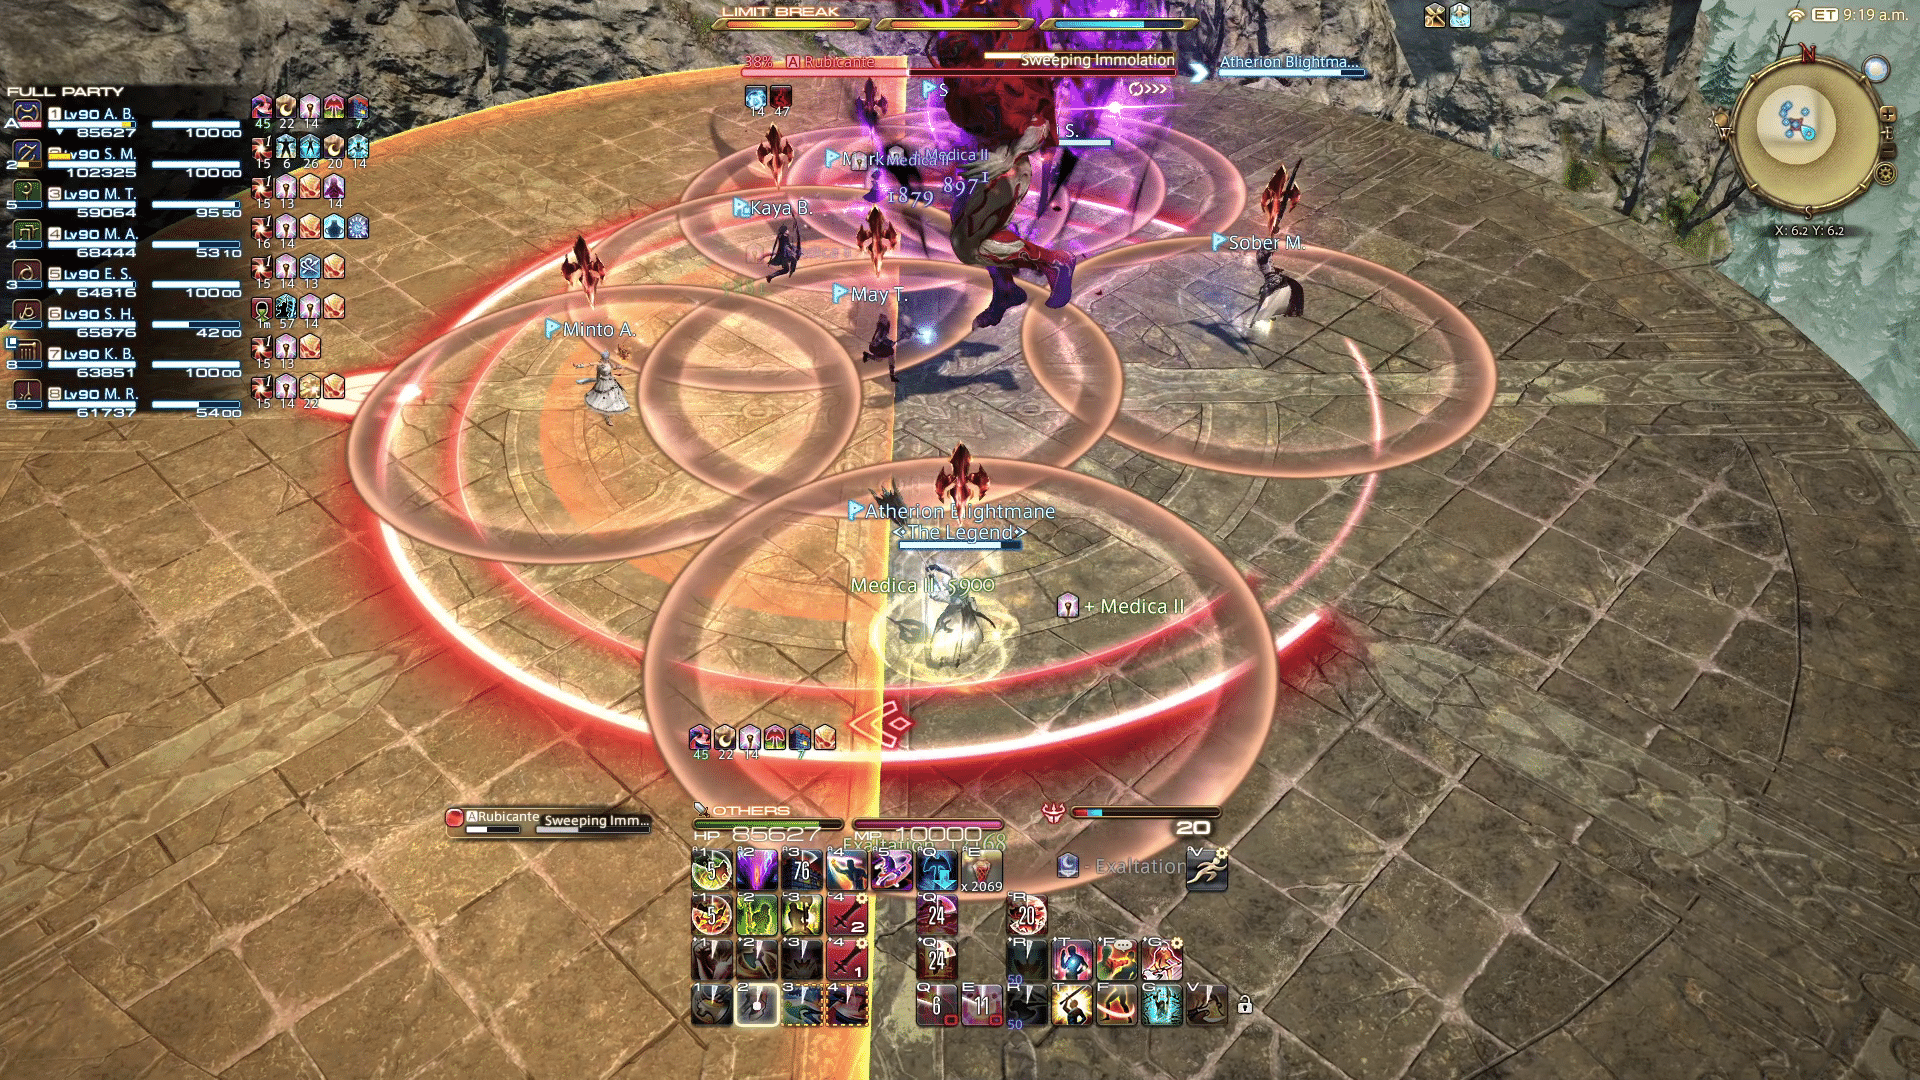
Sweeping Immolation
Rubicante cleaves half of the arena while players deal with a second mechanic. This can either be a party stack or an AoE spread (the above example is what the AoE spread looks like). There’s a lot of room even when spreading so you won’t have much trouble with this one.
And that’s every mechanic in Mount Ordeal, the new trial from Final Fantasy 14’s 6.3 update! Consider checking out our guide for Lapis Manalis, the newest dungeon added to FF14.
Stay connected to MP1st and the latest news by following us on Bluesky, X, Facebook, TikTok, YouTube, and Google News.