
Banishers Ghosts of New Eden Best Gear, Weapons and Build Guide

Your loadout plays a big part in Banishers. Equipping the right items can entirely change how you play and make combat an absolute breeze. To that end, we’ve compiled a list of Banishers: Ghosts of New Eden best gear to help you decide how to set Red and Antea up for success.
Something to note: there may be minor spoilers in this guide for locations or story beats. We’ll keep it vague, but if you want to go in totally blind, we recommend you stop reading here. You’ve been warned!
Without further ado, let’s take a look at the optimal equipment to use in-game.
Banishers: Ghosts of New Eden Best Gear, Weapons and Where to Find the Equipment:
Outfit

Marauder Armor: Damage taken is reduced up to 30% the higher the Health Gauge. You can purchase this armor set pretty early on from Nellie Heayton at the Hunters Camp. It costs 800 pieces of eight, but you can bump that cost down to 600 if you complete her Haunting Case and side with her at the end. This armor gets more useful the more Altars of the Incarnate you collect (you can check out our guide for all the Altar locations here) and it’ll ensure you stay alive in combat. It’s an easy choice.
As an alternative, we could also recommend the Banisher Garment. With this Outfit, hitting an enemy grants 2 Banish points. This one’s useful if you use a certain Amulet that refills your Spirit Gauge when getting defeating enemies with Banish, which we’ll get to shortly. Even without it, having your Banish meter grow twice as fast can be very useful for outputting big damage numbers. The Banisher Garment can be found in the Deceased Inhabitant’s Personal Belongings Locked Chest in the Harrows Hamlet.
Saber & Firebane

Second Wind: Defeating an enemy with Melee attacks restores 7% Health points. Keeping your health up is always useful, especially when paired with the Marauder Armor. This will also save you from having to use Decoctions unless you’re really in a pickle, making it an easy top choice. You unlock this weapon after completing the “Prudence in All Things” Haunting Case, which can be accomplished as soon as you make it to the Hunters Camp early in the game. Having it so early also enables you to upgrade it regularly as you progress.
Grand Behourt is our second choice. With this weapon, Charged Heavy attack damage is increased by 80%. It’s always helpful to have your high-damage attacks do even more damage, so it’s pretty hard to go wrong with this one. The only potential drawback is that charged Heavy attacks can be difficult to hit sometimes, but even so, we think it can be worth using. Grand Behourt’s found in the Smuggler’s Loot Locked Chest in the Western Mire Marshes.
Rifle
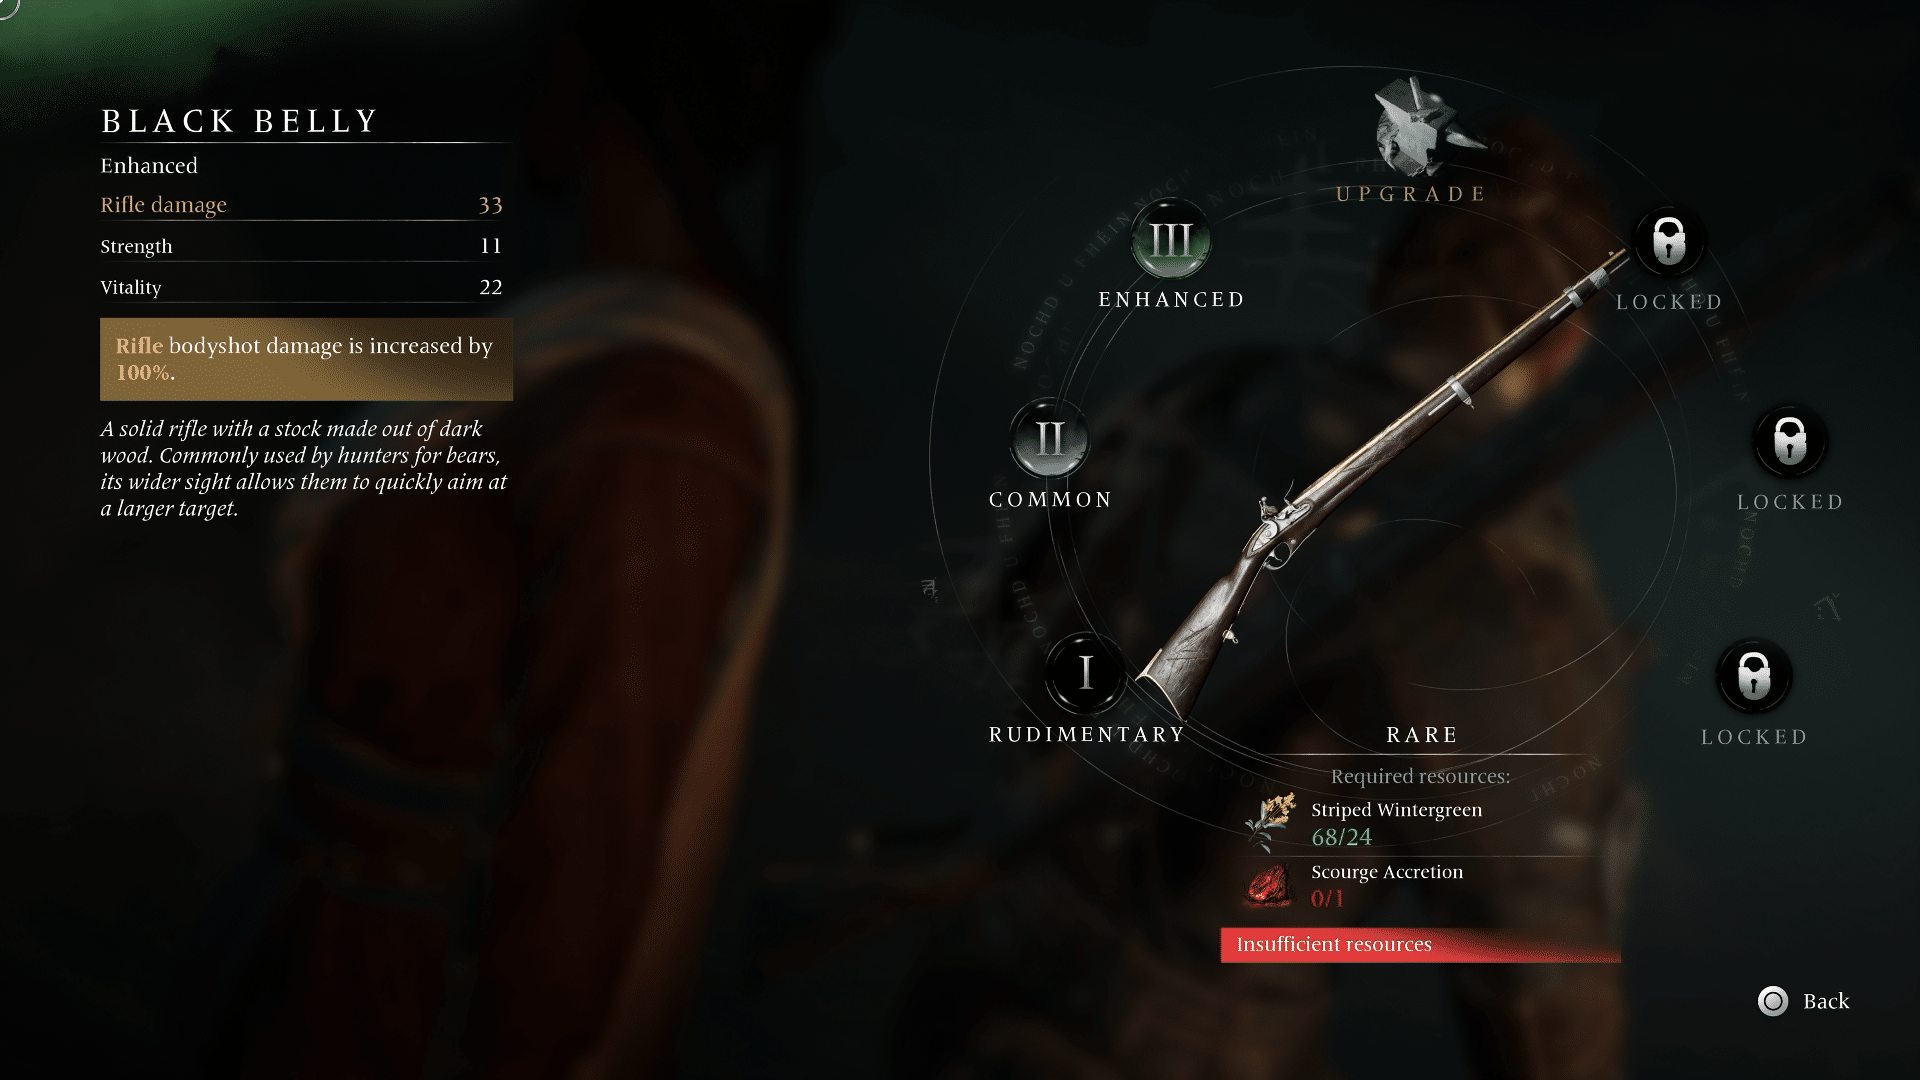
Black Belly: Rifle bodyshot damage is increased by 100%. This just makes every one of your imprecise Rifle shots do significantly more damage, and that’s fantastic. It’s found in a Lost Chest near the underground Dormitory shelter in Mount Pleasant which you’re likely to come across while completing the story quest.
Our second pick for your Rifle is Swift Shot. Each weakspot hit with the Rifle increases the damage of the Rifle by 40%. This effect can be cumulated (resets after a miss). This one’s especially useful if you’re a sharpshooter, as hitting weak spots over and over can very quickly rack up immense damage numbers. That being said, aiming your gun can be a bit unwieldy at times, making this slightly less useful than the Black Belly. You can find this one in a Lost Chest on the East Side of the Mire Marshes after you complete your first Void travel.
Amulet

Metamorphosis: Defeating an enemy with a Banish refills the Spirit gauge by 100%. You receive this Amulet after defeating the main boss of the story section in the Fort Jericho mines. Most of our items for Antea center around using her Manifestations and having your Spirit gauge filled, making this incredibly useful. It also pairs well with the Banisher Garment Outfit. This Amulet makes it easy to expend your Spirit gauge on a possessed enemy, swap to Red to get a quick Banish kill on a smaller enemy, and then go right back to whaling on other possessed enemies with Antea.
An easy alternative to this is Equilibrium: Damage dealt by Red and Antea is increased by 25% against wounded enemies, but decreased by 90% against full health enemies. The obvious caveat here is that this Amulet makes your first strikes very weak, but it’s easy to hit each enemy in an encounter once, and after you’ve done that, all of your damage becomes boosted by a nice amount. It can negate the power of Swift Shot’s weakspot damage buff though, so it might not be good to use in tandem with that Rifle. It can be found at Siridean’s Hut during the main story quest.
Wristband

Earthbound: Punch attack area of effect size is increased by 100%. Being able to hit multiple enemies with Antea’s punches is simply overpowered. The increased range on those attacks makes it all the better, and it can potentially even save you from attacks from enemies you aren’t currently targeting. It can be found in the Bligh Manor Stolen Effects Locked Chest at the Bligh Estate in Mount Pleasant.
As Above So Below is also a good choice for your Wristband slot. Using Leap increases the damage of the next Punch attack by 150%. Getting a huge boost to punches is always welcome. You’re going to be using Manifestations very regularly so this is a super helpful piece of equipment to have. It’s only second because it’s tough to beat that constant AoE increase you get from Earthbound. This one is found in a Lost Chest by the Collapsed House shelter underneath the Harrows Hamlet, which you’ll come across naturally during the main story quest.
Brooch

Death’s Head: The third Punch attack reduces Manifestations cooldowns by 5 seconds. This is a must-have on Antea. Spamming Manifestations can be the quickest way through many combat encounters, so having a way to refresh them so quickly is paramount. You’ll find it in a Cursed Chest in the caves beneath the Harrows Hamlet.
Otherwise, we’d recommend Vigor Mortis. With this Brooch, Outburst area of effect size is increased by 70%. As we’ve said before, extra AoE is always welcome. Outburst is really useful for crowd control, so having a larger damage area for it is amazing (though not as amazing as decreased cooldowns!). You can find this one during the “A Hellbound Heart” Haunting Case in the Harrows Hamlet.
Decoctions

Essential Liquor: Hitting an enemy with the third Punch attack restores 6 Spirit points. This pairs excellently with the Death’s Head Brooch, since every third punch will cooldown your Manifestations and give you Spirit points to spend on them at the same time. Keeping the Spirit gauge up is especially useful in combat. This can be obtained from defeating the Clouded Harvester in the Northern Mire Marshes.
Our recommended alternative is Healing Shot. Hitting a weakspot with the Rifle restores 7% Health points. Using this with Swift Shot kills two birds with one stone (er, bullet?) since you can build your HP up while you’re dealing massive damage. This one’s easily found in a Lost Chest on your way to the Harrows for the first time, so just keep an eye out for it when you head through your first cave in that direction.
Bane Ring

Halcyon Days: Manifestations consume 5% of current Health points but deal increased damage: Outburst by 50%, Ensnare by 100%, and Leap by 200%. We’ve already emphasized how useful Manifestations are in combat, and when you have increased damage alongside quicker cooldowns with Death’s Head and easy health regeneration with Second Wind, this Bane Ring is second to none. You can find it in the Forsaken Farm Haunting Grounds in the North of The Harrows.
Our last alternative option is Born of Trees. Damage dealt by Antea is increased by up to 50% the higher the Spirit gauge. Obviously, this one’s more useful with items that keep your Spirit gauge high, but you can only deal more damage with this Bane Ring and never less, so it’s a really nifty item to have. It’s found in a Locked Chest in the Westernmost end of the Mire Marshes.
And there you have it! Those are our recommendations for Banishers: Ghosts of New Eden best gear. We’ll be posting guides all week, so make sure to stay tuned in to us here at MP1st to be up to date.
Related MP1st Reading
- Banishers: Ghosts of New Eden Exorcism Quest Guide
- Banishers: Ghosts of New Eden Review – Ghost of War
- Banishers: Ghosts of New Eden Gameplay Was Mainly Inspired by God of War
Stay connected to MP1st and the latest news by following us on Bluesky, X, Facebook, TikTok, YouTube, and Google News.
you didnt say where the banisher garb is you human waste
So the Metamorphosis amulet didn’t drop for me after the fight. Is this supposed to be a 100% guaranteed item drop?
We had the wrong boss listed for that amulet. It’s been updated to reflect the proper requirements. Sorry!