
Helldivers 2 Best Stratagems Guide: Most Effective Stratagems to Use Against the Enemies of Super Earth


Helldivers 2 is currently suffering from success, facing numerous server issues as a result of immense player counts. Now that the servers seem a bit more stable, we’re excited to bring you our Helldivers 2 best stratagems guide to give you an idea of what to prioritize when heading to the frontlines in the fight for Super Earth.
Keep in mind, there are a LOT of stratagems available in this game, and while we’ve picked out a few of our favorites that we think really shine, it’s always good to find what suits your playstyle and experiment with the options. With that being said, let’s get into our picks for the best stratagems in Helldivers 2.
Helldivers 2 Best Stratagems Guide
We’re going to break down the best stratagems by the categories they’re separated into in-game to make them easier to navigate. These include Support Weapons, Supply Backpacks, and Offensive and Defensive Stratagems. We’ll start with the Support Weapons.
Support Weapons

There’s a whole bunch of Support Weapon stratagems in Helldivers 2, but here are our picks for the best ones:
- Machine Gun – At earlier levels, the Machine Gun is a great choice for your support weapon. You get it automatically from the start of the game, so you don’t have to do any grinding to use it. With a high rate of fire and some very respectable damage, it’s hard to go wrong with this one.
- Expendable Anti-Tank Launcher – Once you’ve earned a few levels, it’s also useful to pick up the Expendable Anti-Tank launcher for help against some of the game’s larger enemies. While it only has one shot, the stratagem pod drops two of them with each call-in, meaning you can very quickly dish out some big damage every 70 seconds.
- The Recoilless Rifle is another option for this slot, but with a hefty reload timer and a required backpack attachment to use it efficiently, it’s a little more of a hassle.
- For more objective-based explosive handiwork, pick up the Grenade Launcher, which can make clearing out Bug Nests an absolute breeze.
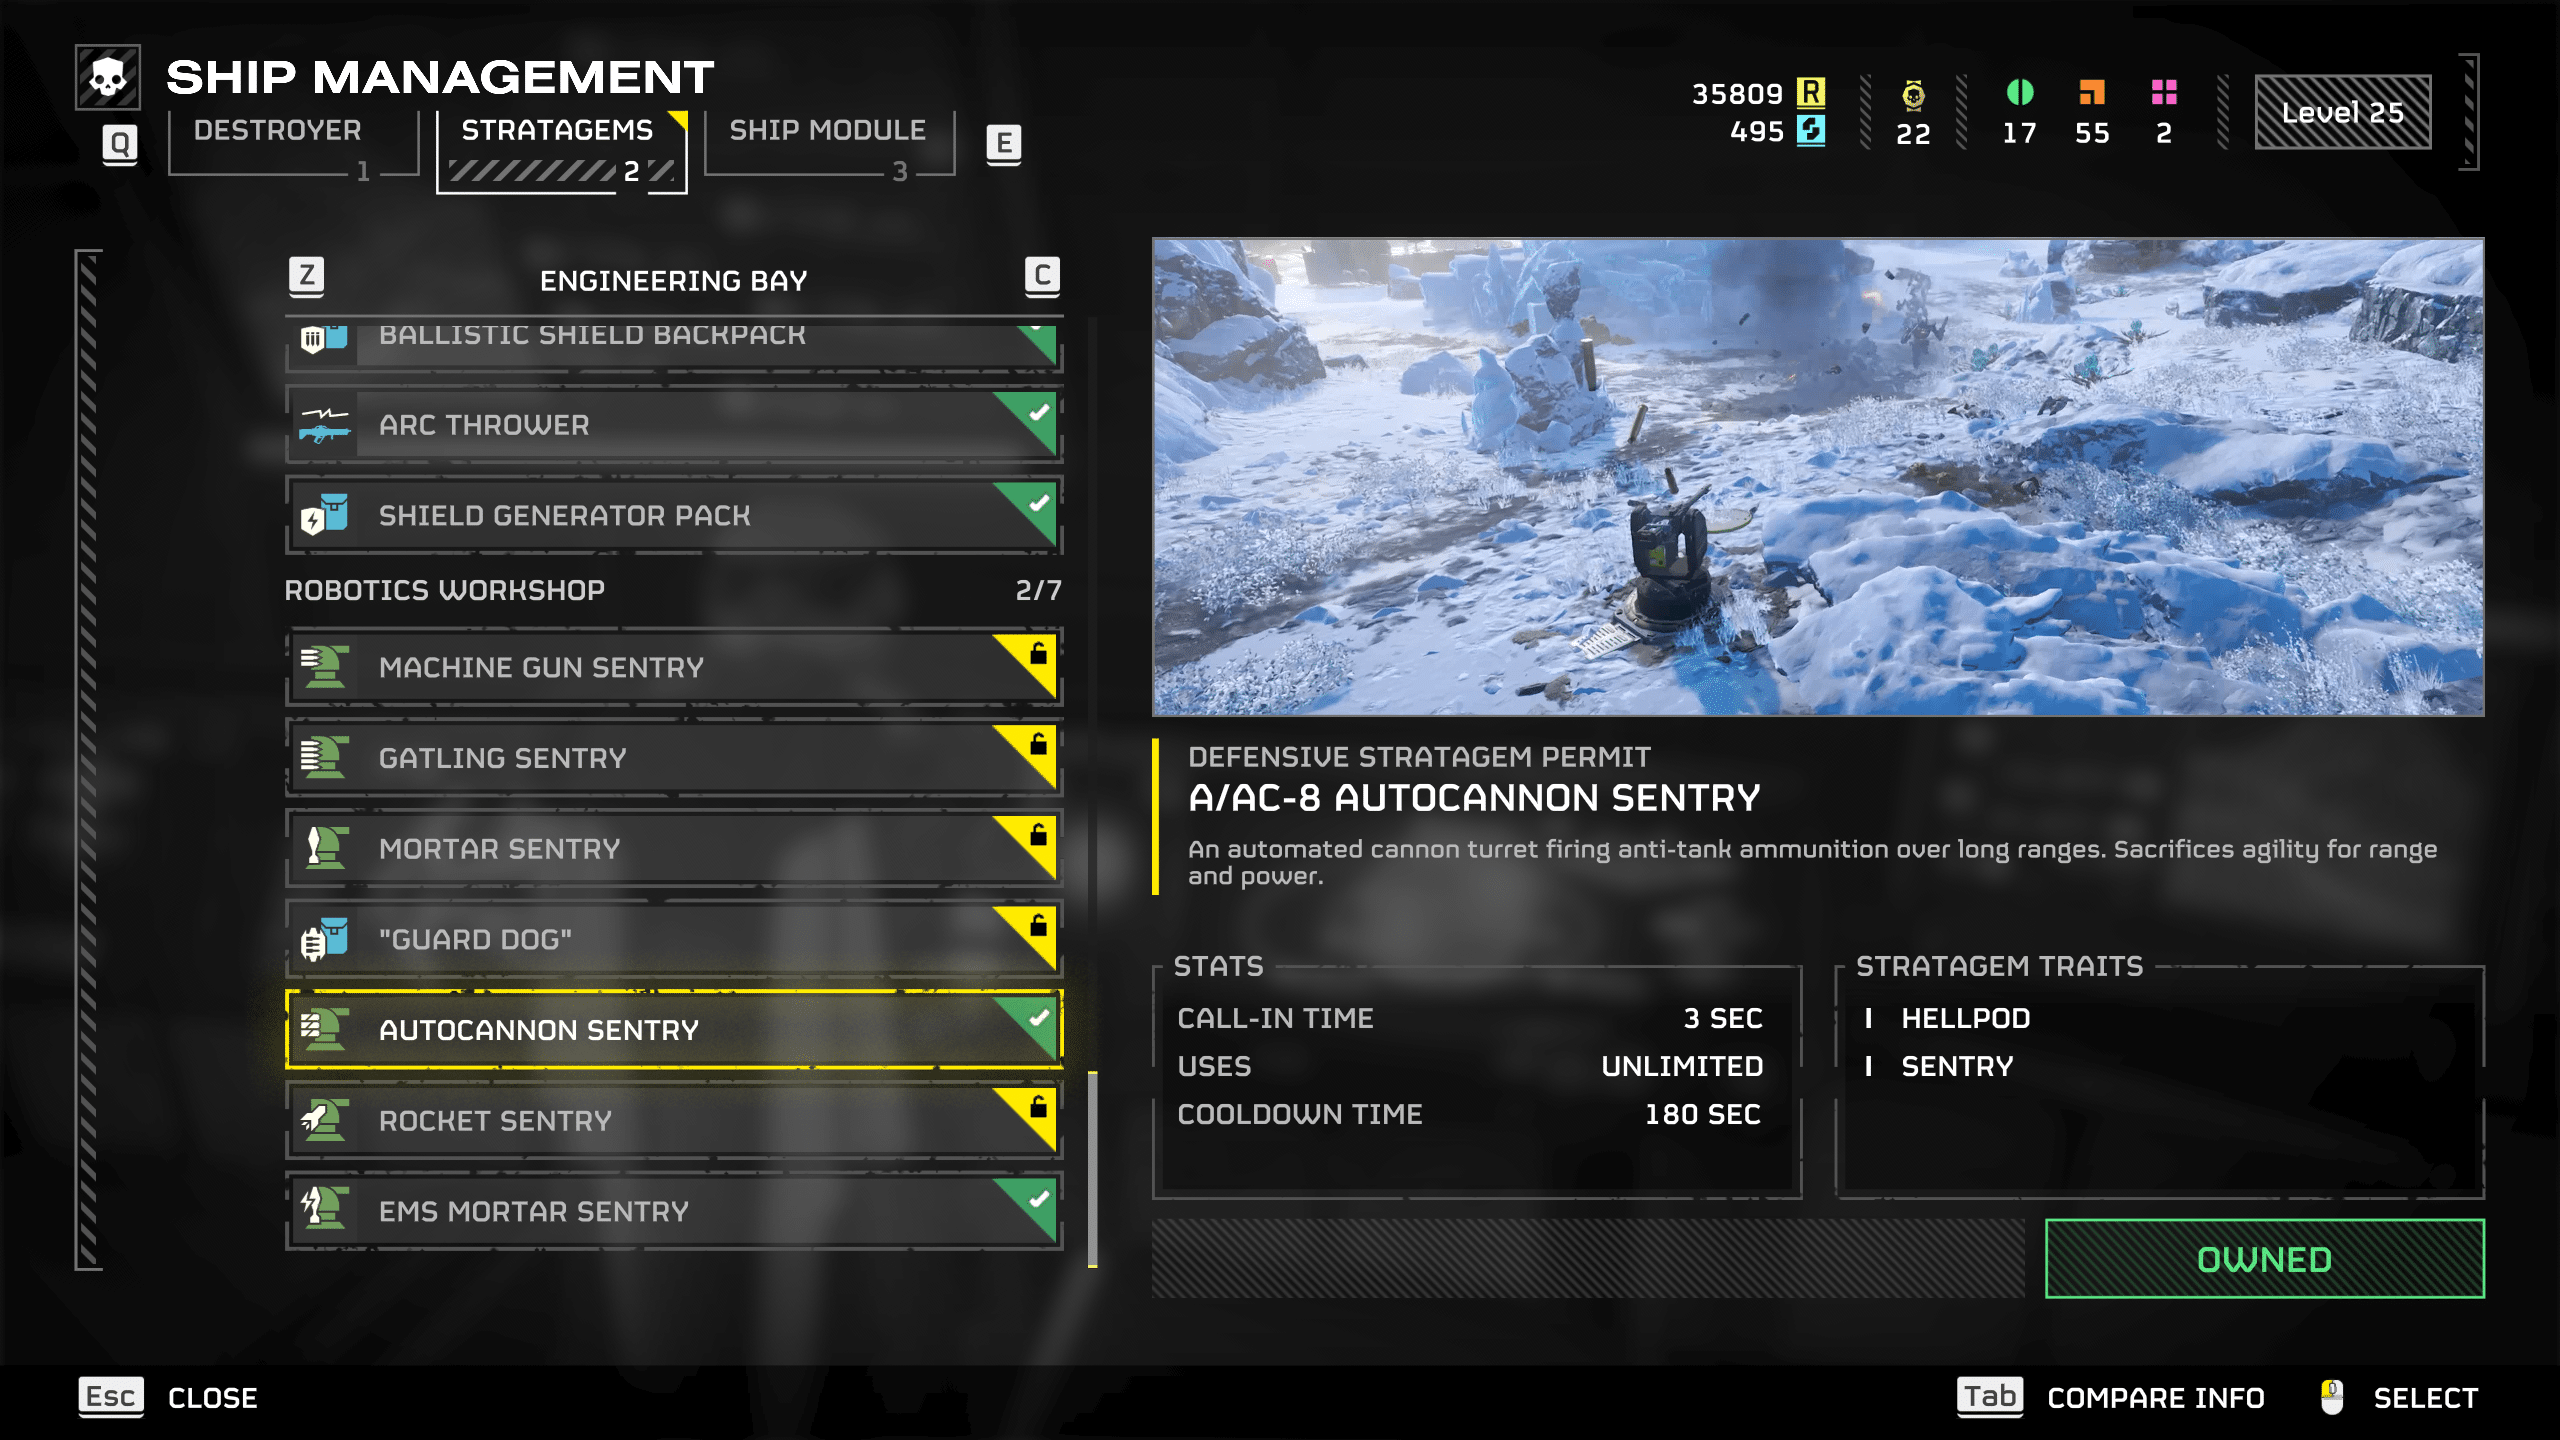
- Autocannon – The Autocannon is a slightly more ammo-efficient version of the Grenade Launcher, useful for quickly doing away with large enemies and destructible objectives. It requires an ammo backpack to use at full capacity, which can make things a little dicey when you’re being swarmed down on and don’t have a shield or Guard Dog pack to defend yourself, but this weapon is top tier for getting stuff done. If you have a friend willing to help you reload, it can really turn the tide of a battle.
- Arc Thrower – A commonly slept-on Support Weapon is the Arc Thrower. This one’s tucked away in the Engineering Bay section of the stratagem menus. You have to be at least Level 15 to unlock it. The Arc Thrower shoots streams of electricity that jump between targets and deal a very consistent amount of damage, ignoring armor entirely. It has unlimited ammo, it’s fantastic for clearing out rabble and large amounts of small enemies, and you can take care of bigger enemies like Chargers and Devastators in a pretty reasonable chunk of time at medium difficulties as well. The main reason people avoid this weapon is because it effectively aims itself and doesn’t discriminate between friendlies and hostiles, making it very easy to accidentally fry your fellow helldivers in an attempt to clear out the battlefield. That being said, if you’re careful about your positioning, it can be extremely easy to leave a mission with the most kills on your team using this one.
- Railgun – The Railgun is the king of this category. You need to hit Level 20 before you can even purchase it, so it’ll take some grinding to get your hands on, but once you do, there’s nothing quite like it. Its powerful charged shots only take a second to wind up. You do have to reload between every shot, but the reload is snappy. Its damage numbers are almost as high as some of the explosive weapons, and it penetrates armor pretty easily too, making it a must-have once you have it unlocked. Its only downside is its 20-round capacity, meaning you’ll benefit pretty heavily from frequent ammo resupplies. All things considered, however, the Railgun absolutely rips the opponents of democracy to pieces.
Supply Backpacks
Supply Backpacks can make or break your survival in Helldivers. Here are the ones we find especially helpful:
- Supply Pack – The earliest (and arguably most consistently useful) Supply Backpack you can get your hands on is the Supply Pack. This backpack drops with four resupplies included and can be refilled with the regular Resupply stratagem. Being able to refill your weapons, grenades, and stims on the go is incredibly helpful. It’s also great for using certain ammo-hungry Support Weapons like the Railgun. We highly recommend unlocking this backpack at your earliest opportunity.
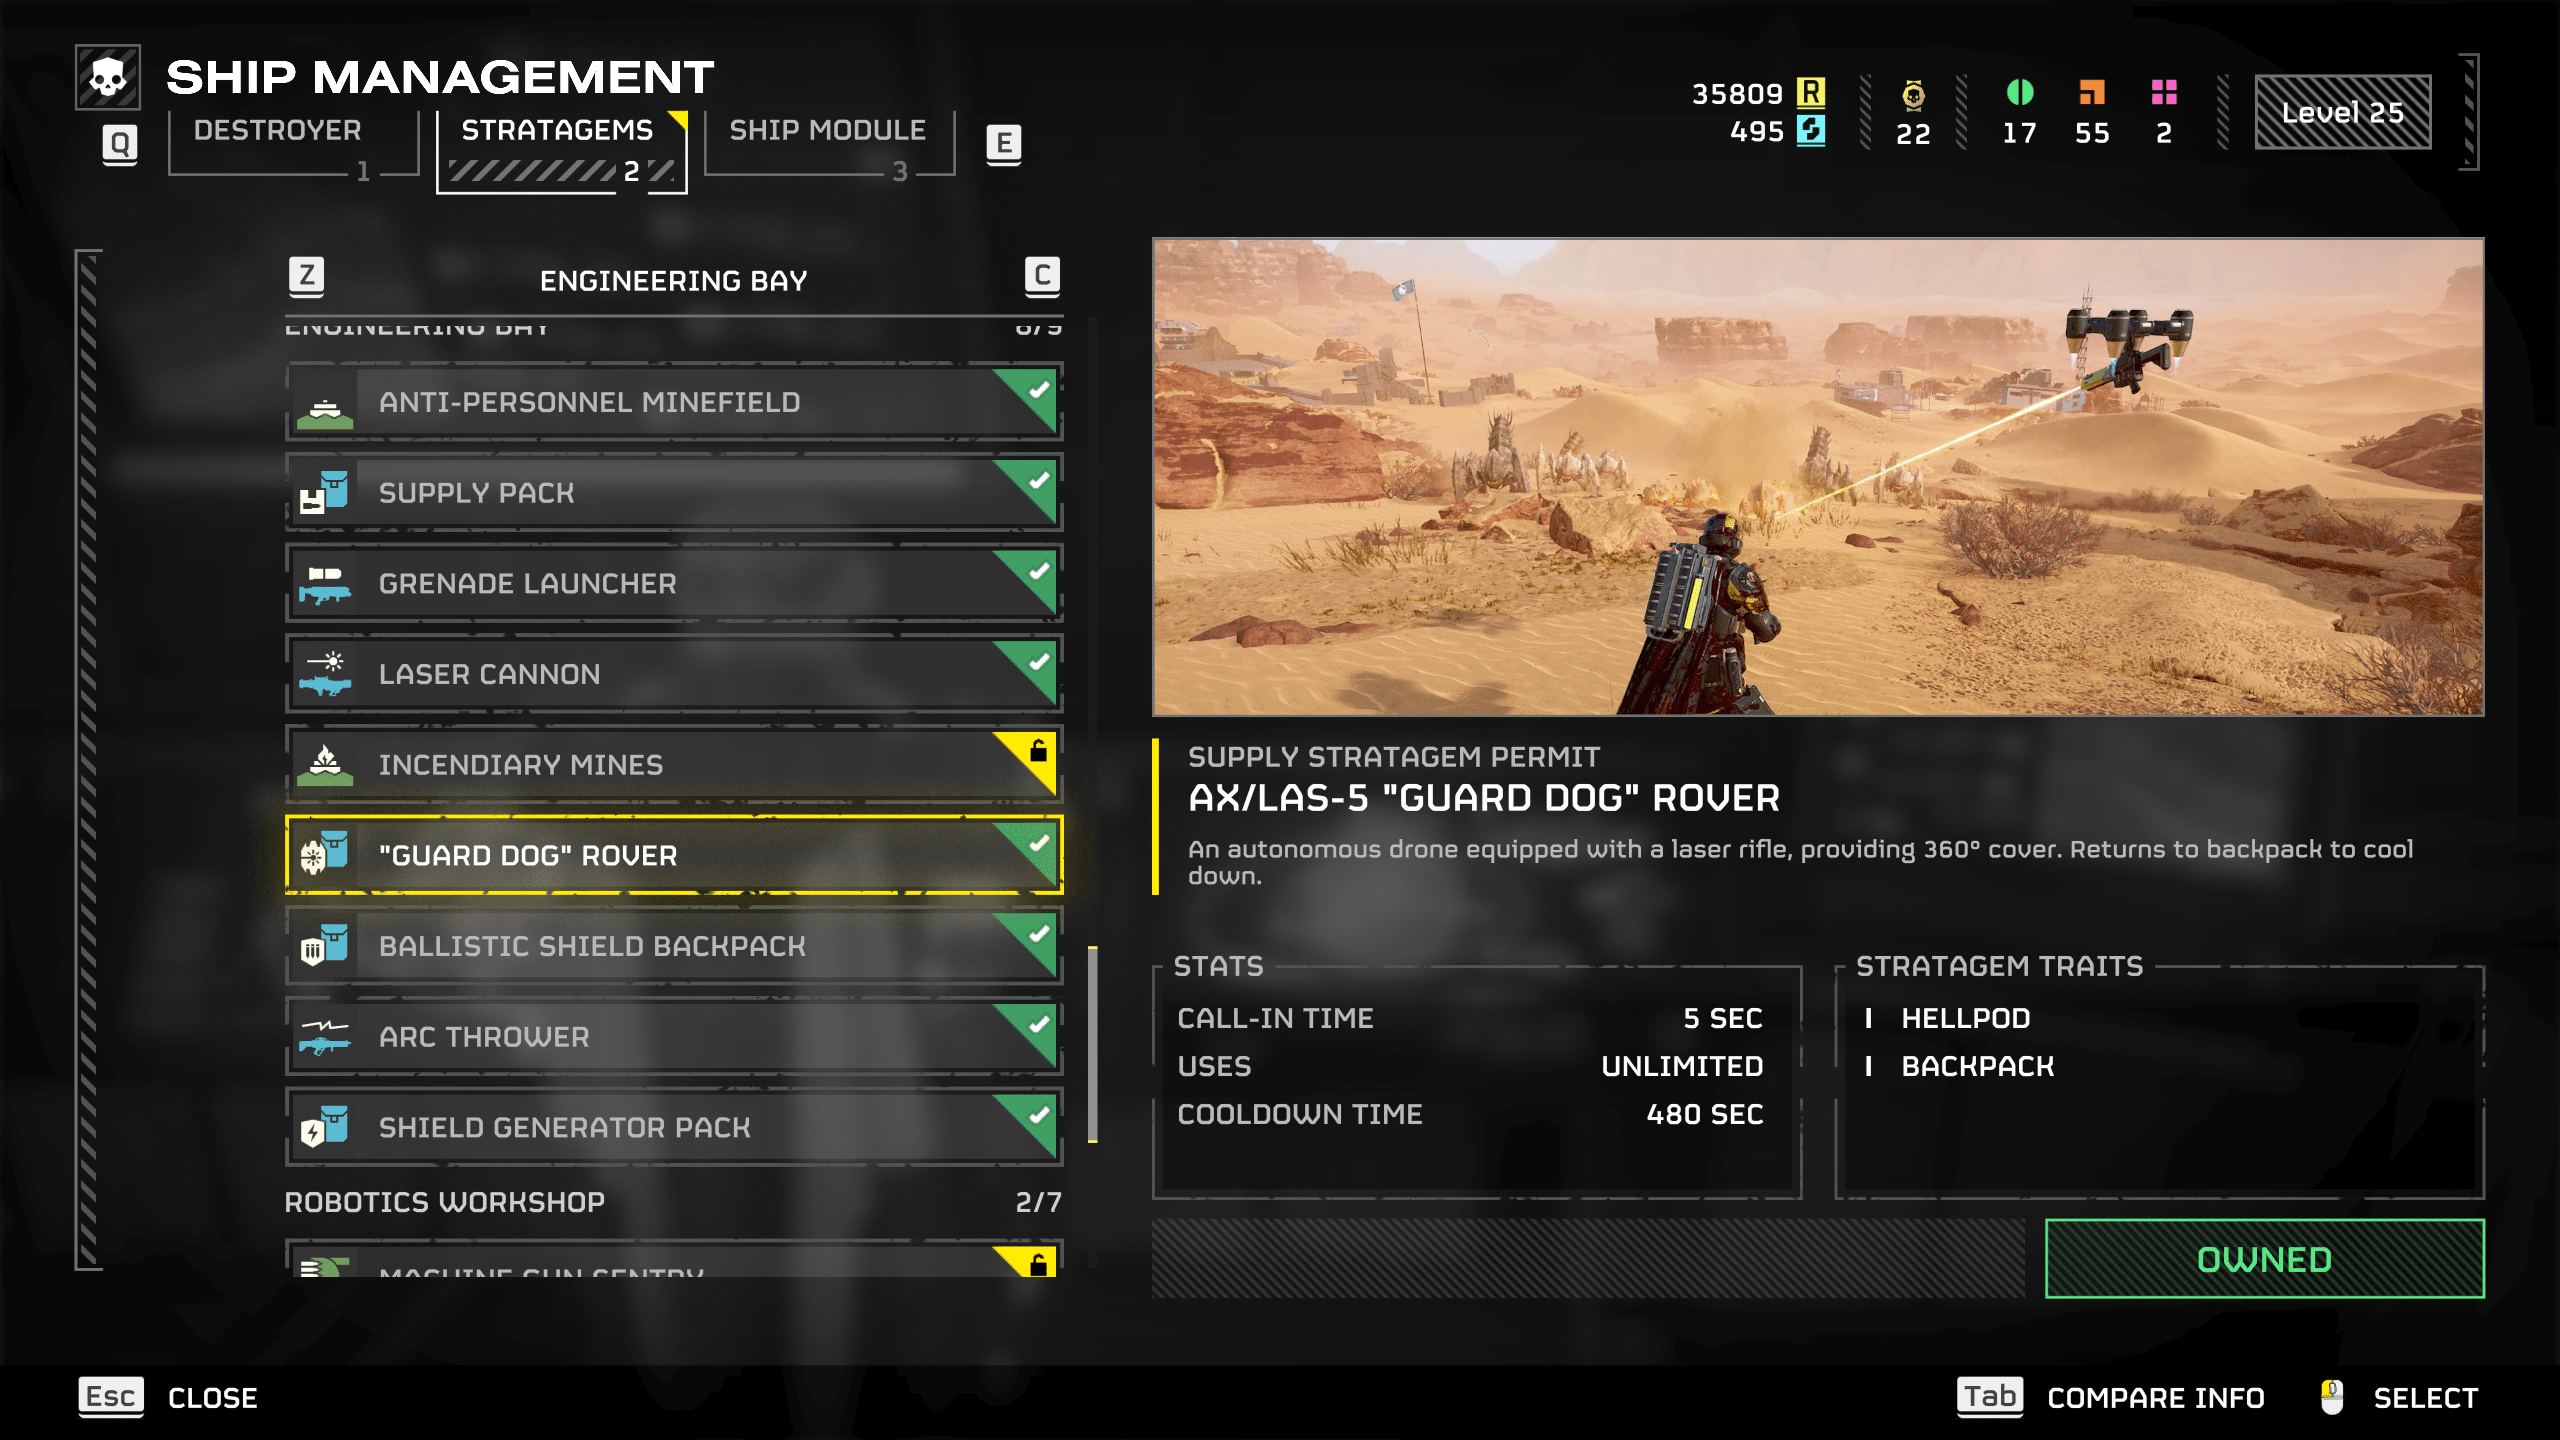
- “Guard Dog” Rover – A little down the road, we suggest grabbing the “Guard Dog” Rover. It’s important to note that this backpack is different from the regular “Guard Dog” backpack, which uses ballistic ammo instead of laser ammo. The constant laser of the Rover variant deals very consistent damage to smaller enemies around you while you focus on taking down bigger targets. The gun attached to the Rover also never needs to reload or cool off, meaning it can dish out damage with relentless fury. This is the best backpack for taking out Terminids, hands down.
- Shield Generator Pack – If you’re looking to face off against the Automatons instead, then make sure to pick up the Shield Generator Pack once you hit the proper level requirement. This thing can tank hits from all sorts of big enemies. If it goes down, it only takes about five seconds to repair itself. It can really save your skin in the more chaotic missions, making it a necessary addition to your kit once you start reaching higher difficulties. The only downside is that it takes your backpack slot away from some more utility-heavy backpacks like the Supply Pack, but it’s a sacrifice you’re going to have to make to stay alive when the going gets especially tough.
Offensive Stratagems
Offensive Stratagems are the bread and butter of Helldivers 2. Without them, you’re a squishy mound of flesh waiting to get torn apart; with them, you’re a bringer of destruction and the enemies of Super Earth’s worst nightmare. These are our personal picks for best offensive stratagems:
- Orbital Precision Strike – Right off the bat, you’ll have access to the Orbital Precision Strike. While it is a starter stratagem, make no mistake: its quick cooldown and high damage can still be extremely effective. Until you have enough to buy some of the really good Offensive stratagems, we see no reason to remove this one from your loadout. It’s a great piece to keep in the arsenal early on.
- The Orbital EMS Strike is a more tactical variant of this that stuns enemies who enter its AoE after it lands, which can help to create some distance or get a swarm lined up to be demolished by a different stratagem or weapon.
- Eagle Airstrike – If you’re more into the Eagle stratagems, the Eagle Airstrike is a fine pick early on. It’ll cover a pretty respectable area and quickly wipe out much of the smaller enemy types in one go. Its explosive characteristics even make it viable for use on objectives.
- Eagle 500kg Bomb – Otherwise, the most useful Eagle stratagems are big ones, by which we mean the Eagle 500kg Bomb. These puppies are limited use, but they can absolutely demolish larger enemies, especially when used in tandem with a teammate. The massive explosion of the 500kg bomb is also pretty to look at, which is a nice aside.
- Orbital Gatling Barrage – Once you’ve leveled a bit, most any of the other Orbital stratagems can be effective in the right spots. The Orbital Gatling Barrage does a really decent job of taking out lots of small enemies in a manageable area, whereas bigger stratagems like the Orbital 120mm HE Barrage and the Orbital Airburst Strike can cover a wider area of effect (though make sure to watch out for wandering teammates!).
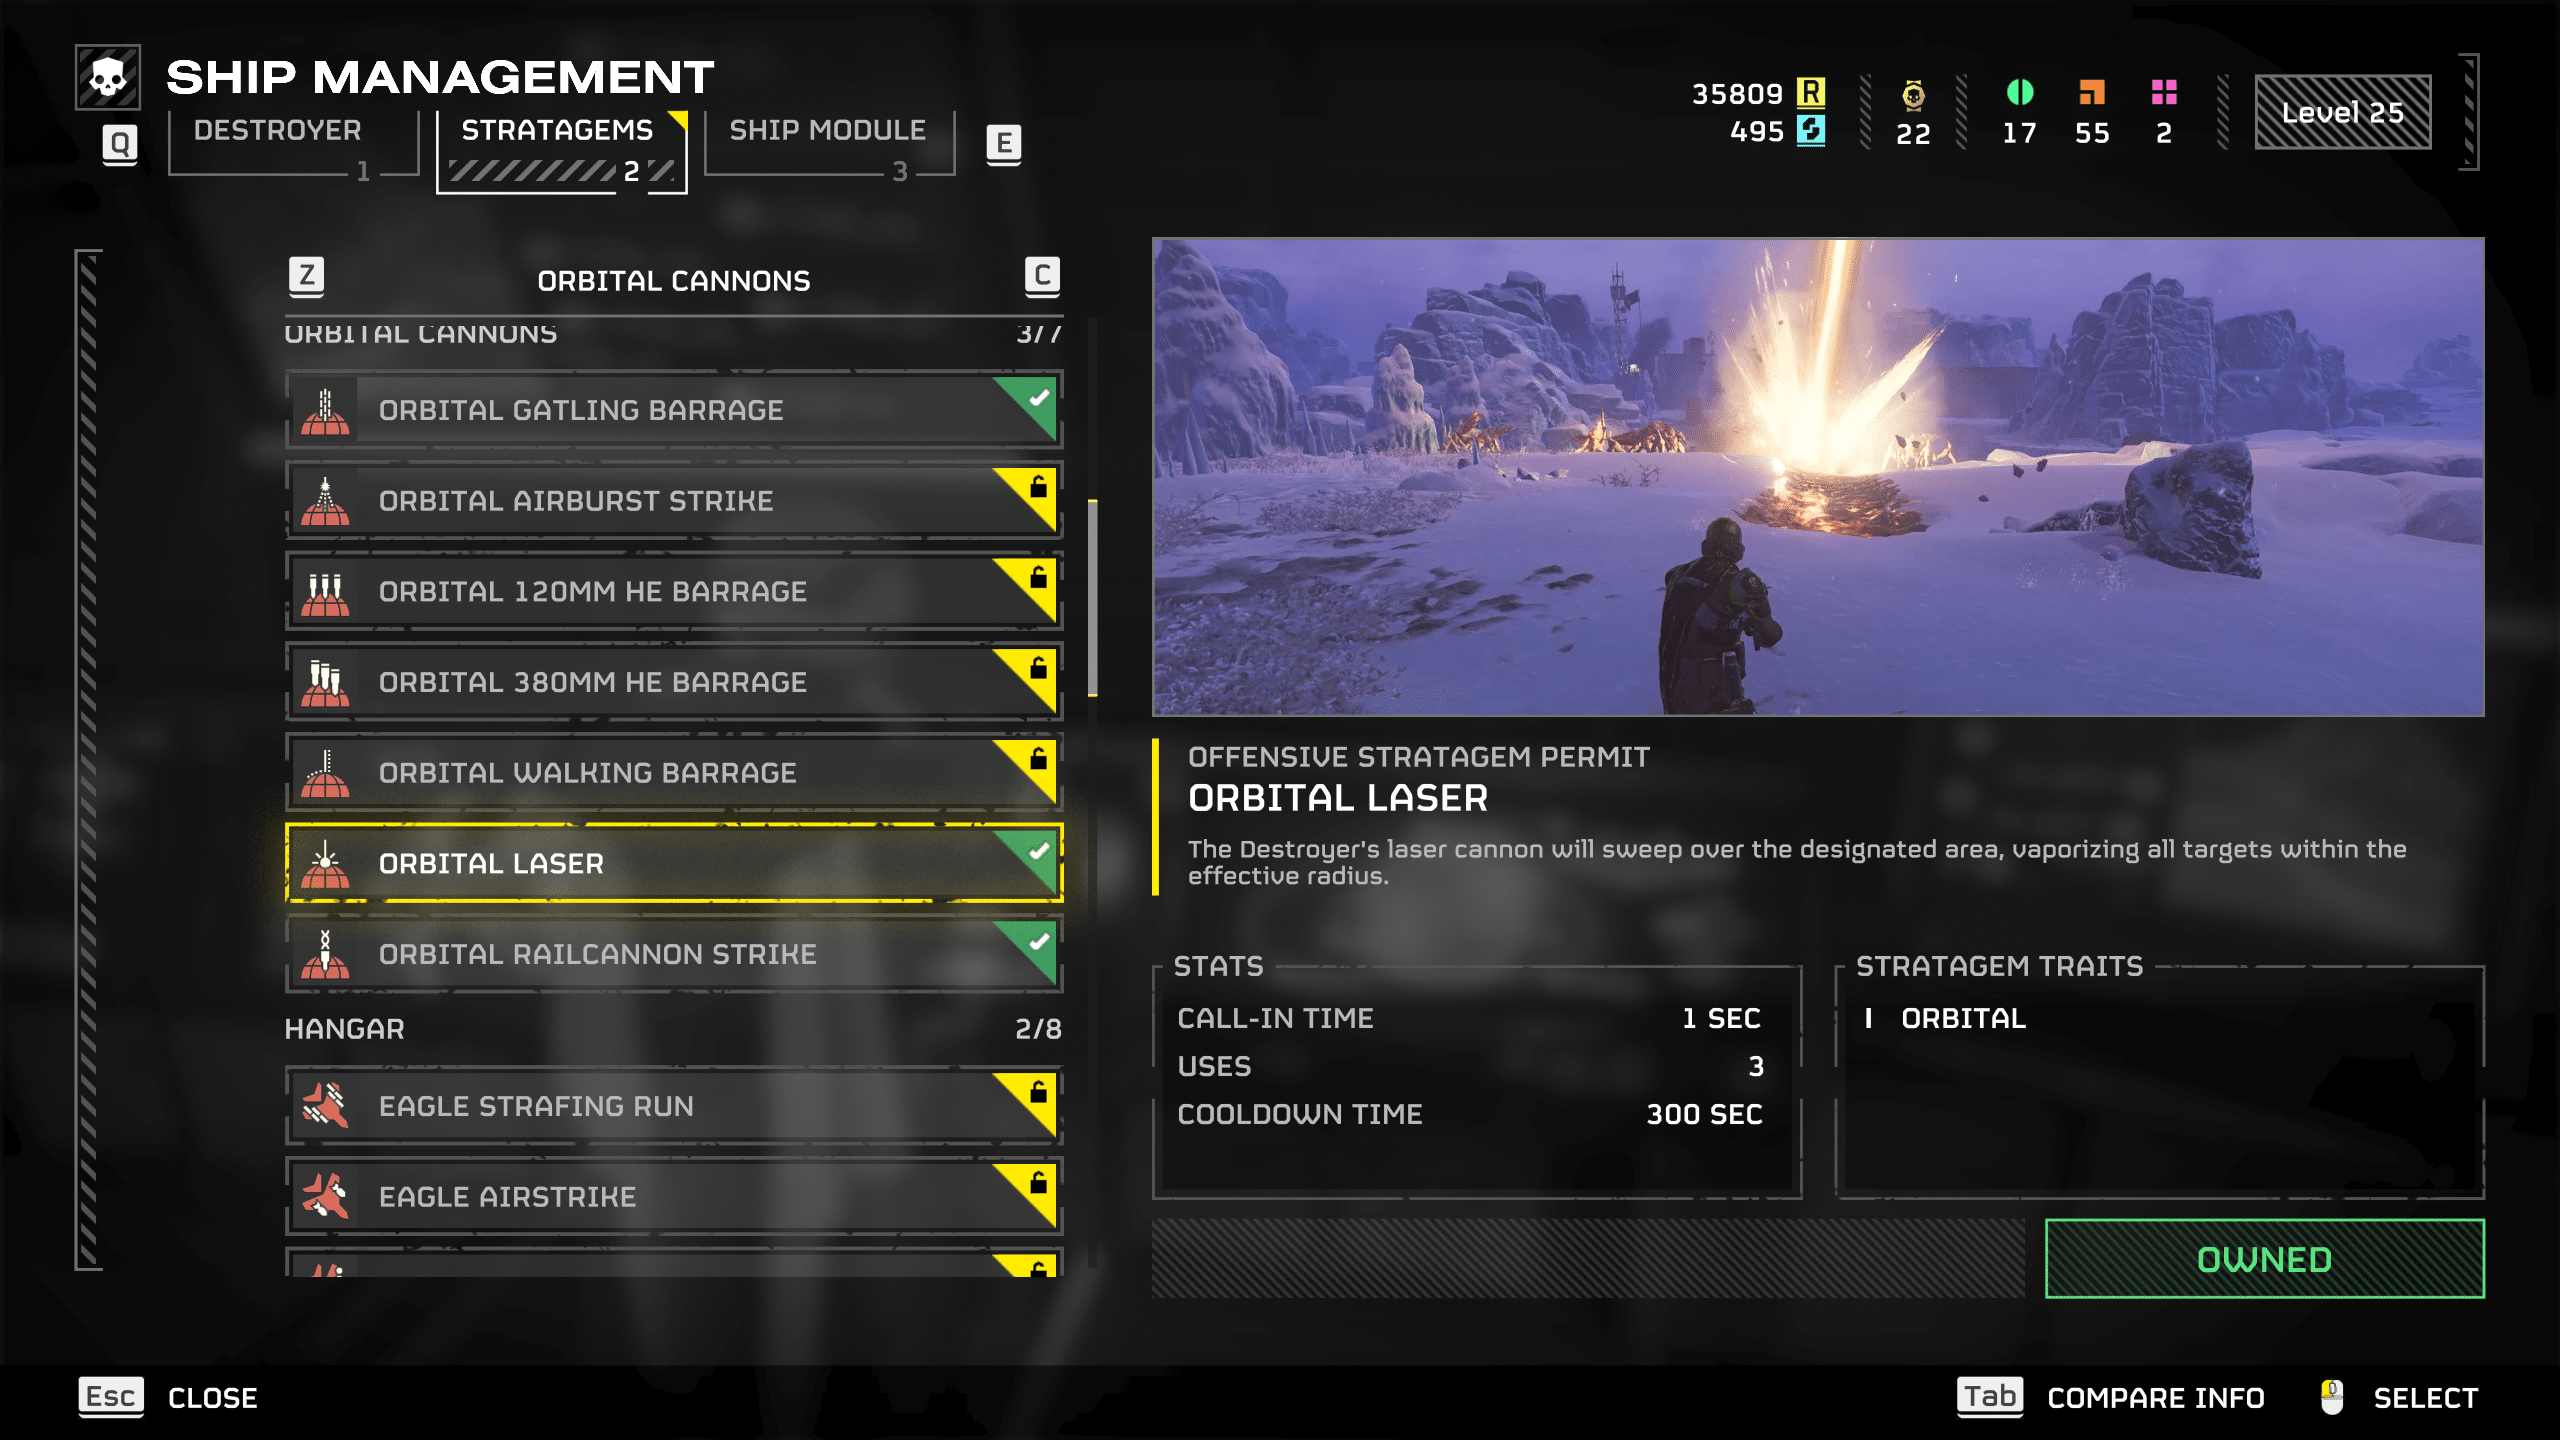
- Orbital Laser – Personally, our favorite Orbital stratagem is the Orbital Laser, which targets the biggest enemies in its drop area and absolutely tears through them. It can also wipe out waves of smaller enemies and even occasionally hit objectives like Bug Nests or Eggs, making it the easy winner for this category.
Defensive Stratagems
Last but by no means least are the Defensive Stratagems.
- Machine Gun Sentry – Early on, you can grab the Machine Gun Sentry for pretty cheap, a simple automatic turret useful for defending objectives or your extraction points. While it only takes a couple of hits from enemies to break, if you position it well it can absolutely shred through smaller enemy types and help manage larger hordes while you’re working on a terminal or waiting for the Pelican to land. It’s a solid choice early on.
- Mortar Sentry – A little down the road, the Mortar Sentry can be especially useful, though it’s arguably one of the most dangerous stratagems to have. If you’re a little too close to the enemies it’s firing at, it can blow you away in a matter of seconds, so make sure to maintain distance if you’re using this.
- The Gatling Sentry is a slightly safer alternative to mortars, but it has a little less raw damage output, so it might not always be the optimal choice for every situation.
- EMS Mortar Sentry – Once you’ve hit high levels, the EMS Mortar Sentry is an easy choice. The EMS Mortar Sentry works much like the Orbital EMS Strike and creates an area of static electricity that stuns enemies, making it phenomenal for crowd control, and if you happen to get caught in its fire, it won’t entirely obliterate you, making it much safer than its regular Mortar Sentry counterpart.
- Tesla Tower – The Tesla Tower, on the other hand, works much like the Arc Thrower in a fixed area. It can gate off funnel points with ease and narrow down how many angles you have to watch when trying to launch an ICBM or realign a satellite. Just be careful not to stand too close to it: it’ll stop your helldiver’s heartbeat in a second.
Those are our picks for Helldivers 2 best stratagems. Of course, it comes down to what you find most useful for what you’re looking to accomplish. More than anything, use what you think is fun. Keep in mind that things could also change with any future updates or patches that rebalance the game’s arsenal. We hope we were able to give you a little guidance in your efforts to reclaim the galaxy for Super Earth.
We’ll have some more Helldivers 2 guide content dropping this week, so be sure to stay tuned in to us here at MP1st.
Related MP1st Reading:
- Helldivers 2 Review – PlayStation’s Most Buggiest Game Yet
- Helldivers 2 PvP Will “Never” Be Added, Crossovers to Be Determined
- Helldivers 2 Sales Soar to 3 Million as Server Cap Is Confirmed to Be 800K, Devs Tease “Exciting Things” Incoming
Stay connected to MP1st and the latest news by following us on Bluesky, X, Facebook, TikTok, YouTube, and Google News.