
COD Vanguard Champion Hill Guide and Alpha Gameplay Fires Out

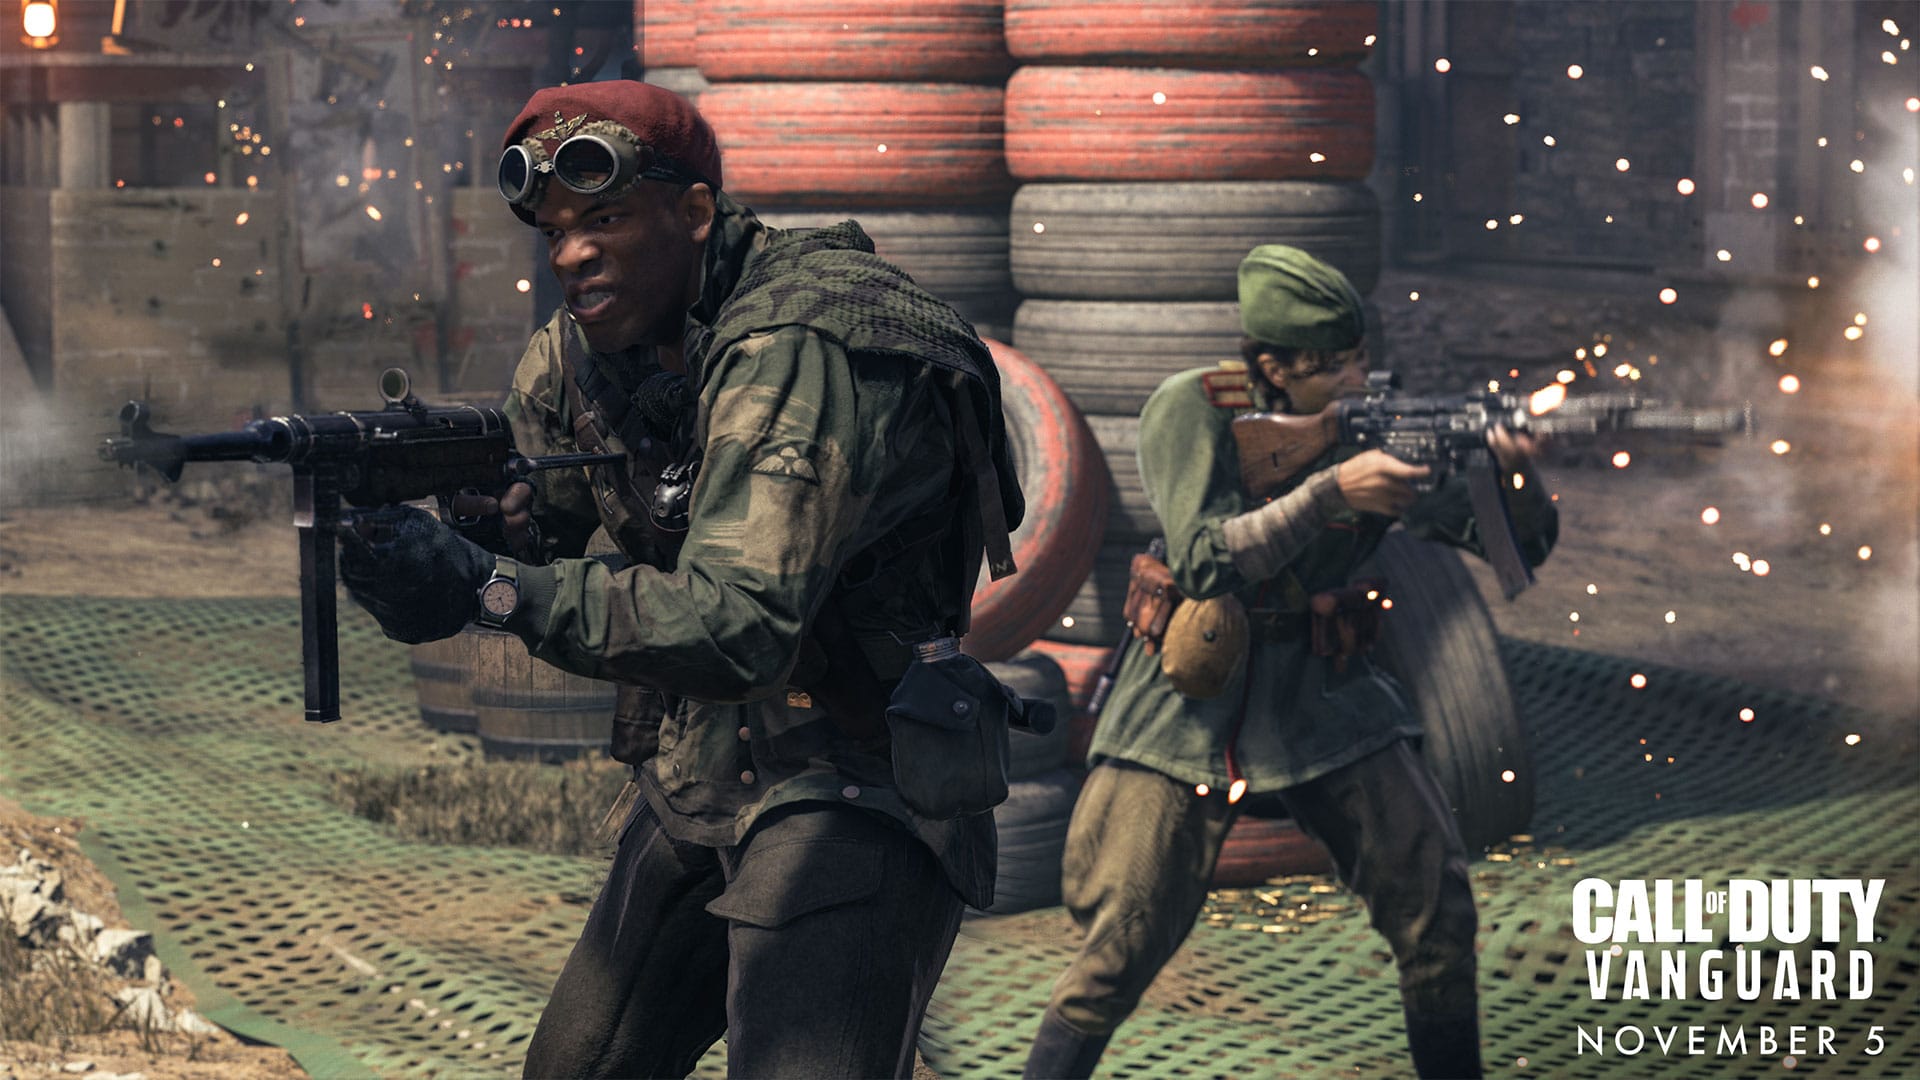
Following the info dump regarding the Call of Duty Vanguard Champion Hill perks, weapons and more, Activision has released the COD Vanguard Champion Hill guide, and we even have some alpha gameplay available as well. Check ’em out below, to see what’s in store for PlayStation gamers this weekend.
- Related Reading: COD Vanguard Sees Return of Doors, Tactical Sprint, Weapon Mounting; Alpha Intro Surfaces
First off, here’s the Alpha gameplay in action below!
In addition to the gameplay, here’s an overview of the weapons, maps, and things you’ll need to know in order to survive in this shooter via the Call of Duty blog:
COD Vanguard Champion Hill Guide:
Part 1 – The Basics – Scavenging, Shooting, and Surviving
“Your team has a whole bunch of lives. Lose all your lives, and you’re eliminated. Last team standing wins.” – Captain Butcher, Call of Duty: Vanguard.
Sledgehammer games is proud to introduce Champion Hill, a multi-arena survival tournament, where tactics and strategy combine with quick-action, close-quarter gunplay.
Here are the basic facts about the mode:
Mode Type: Round-Robin, Limited-Life Deathmatch Tournament
Squad Size: Duos (2v2) or Trios (3v3) — Solos (1v1) available in full game at launch.
Loadout: Same starting Loadout for all — Primary Weapon, Secondary Weapon, Lethal Equipment, and Tactical Equipment. Upgrade your Loadout with Cash dropped in-game or by earning eliminations. Every player starts with $500 in Cash before the first Combat Round. Your available Cash balance is located on the HUD, above the lethal/tactical equipment icons.
Health: 100 HP. Up to three Armor Plates can be on an Operator — these absorb ballistic and explosive damage.
Combat Rounds: 60-second Deathmatches on a variety of small maps (e.g., Airstrip, Market), all located within one massive, all located within one massive map, which is a combination of four combat arenas and a central Buy Areas. There are no load times in Champion Hill – only action.
Number of Lives: 12 (Duos) or 18 (Trios) shared between squadmates, shown as a blue bar on the bottom left corner of the screen (your opponent’s life count, when applicable, appears below it as a red bar). Life count persists between rounds.
Victory Condition: Last squad with remaining lives wins.
What does a game look like in practice? Here’s how it breaks down:
It Begins… Everyone gets a quick explanation of the mode, receives $500 of in-game Cash, and is placed at the Buy Station Area. Over the next minute, players should use this Cash to upgrade their weapons (right on D-Pad) or purchase new weapons and equipment or add Perks (permanent for the game) and Streaks (only last one round) to their Loadout.
The Fight Is On. Squads will fight on one of four maps against a random squad. Within an individual Combat Round, the squad that wins the round gets a $1,000 Cash bonus awarded to each member. Ties result in no money awarded. Eliminating a squad from the game by reducing their life count to zero awards additional Cash and that squad’s weaponry, dropped at their point of elimination.
Repeat or Get Lucky. Squads are re-paired for subsequent Combat Rounds. When there is an odd number of squads, one lucky squad may receive a Bonus Buy Round to rest and restock their Loadouts.
Buy Round Time! After a few Combat Rounds, all squads participate in a Buy Round. Spend that Cash and upgrade that Loadout before the next fight begins!
Stick Around and Spectate. Eliminated squads can choose to watch the rest of a Champion Hill match from the Buy Station Area’s circular spectator platform, which overlooks all four Combat Round fight maps.
Only Two Shall Survive… Once there are only two squads left in the game, the final showdown begins. If you have any Cash saved up, spend it lives, streaks, and any perks you may be missing, as both squads will get a chance to resupply before the big showdown.
…and One Will Claim Champion Hill. The final Combat Rounds are one minute longer – 120 seconds in length – so having the proper loadout and streaks equipped can make the difference between victory and defeat. If neither squad eliminates the other during a Combat Round, they head back to another Buy Round. Make sure to resupply with enough firepower to wipe the enemy out for good… and claim victory on Champion Hill
That is all you need to know about playing Champion Hill. As for mastering it, we have a few tips for turning Champion Hill into your squad’s stronghold of dominance:
Part 2 — Combat Rounds: Map Overviews
“There is no curtain call for bravery.”
“Bravery is what comes after — not what you wear in the moment.” —Members of the 9th Parachute Battalion, Call of Duty: Vanguard
Champion Hill features four small maps for Combat Rounds located around the central Buy Station Area. For each Combat Round, your squad and opponents will be placed in one of these four maps at random.
Because maps cannot be predicted for each round, it is up to you to master all four of them for the sake of your survival.
Along with various environment pieces (some of which are destructible) that help define each map’s structure, every map contains $100 bundles of Cash strewn about the playable area, which respawn after every Combat Round in the same locations. Don’t question free money. In addition to eliminating enemies, these drops can be key to upgrading weapons or purchasing Loadout items during Buy Rounds.
Each map also has an Extra Life Token placed in a precarious position, usually in a spot with plenty of exposure to sightlines. The Operator who picks it up will give their squad an extra life, or a $750 Cash bonus if the squad is maxed out on lives.
In alphabetical order, here are each of the four maps available in the Alpha, including a description of the area, a tip around one of its features, and where the Extra Life is located. Use the slider to see where the Extra Life is located on each map.
Airstrip (East Map)
Description: The “largest” of the four maps, the Airstrip features three stationary biplanes sitting on a central runway, with squads spawning in on opposite ends of the strip, either at the main hangar or toward the Buy Station Area. Outside of the main runway, there is a rocky north route and a container-heavy south route with an underground bunker at center.
Feature: The airstrip itself is one long sightline, but it is also the “roof” to a central underground bunker. Destroy its wooden walls preventing entry, and either use the bunker as a place of respite or knock it all down to have a fast route underneath the map’s center.
Extra Life Location: Unlike other maps that have a central Extra Life location, Airstrip’s token spawn is on a lookout tower north of the runway. Ascend a ladder to reach the token’s location, and stick around if great sightlines over a sizable area outweigh the danger of complete exposure to crossfire.
Courtyard (North Map)
Description: A symmetrically designed map, Courtyard features four structures: two long buildings that act as spawn areas and two rectangular buildings at center. All four buildings have destructible wooden barricades. Between the spawn buildings and central buildings are large outdoor spaces containing barrels and small U-shaped outlets, with a small alley linking the two open-air spaces in the middle of the map.
Feature: Outside of the destructible central buildings, the two spawn buildings have plenty of depth to them, including some open-air spaces at the ends. If those opponents are presumed MIA, it might be worth checking back in these spaces, either head-on or with a well-placed grenade.
Extra Life Location: Look between the two central buildings to find the Extra Life Token floating right at the map’s center. The most direct path is right down the middle, but one could run through either building or look through the open archways onto the token.
Market (West Map)
Description: Modeled after a Parisian town square of old, the Market is a roughly square-shaped map with teams spawning either north or south of the central platform, which has a direct route through it via a gap in the sandbag fortifications. Around the center are a few fruit stands and buildings, including a café to the east (adjacent to the Buy Station Area) and two long buildings to the west and south, the former having an outdoor deck and the latter a more secluded open-air space.
Feature: Not only are the market stalls easily penetrable like most objects on the map, but they also can be climbed upon. This can allow for some verticality in a pinch, which is great for better sightlines over the map or to potentially confuse opponents looking only at the ground level.
Extra Life Location: Rush past the freestanding tables to find the Extra Life sitting right on the market’s central platform. Mind the sightlines through the gap in fortifications as well as over them, as they are only waist high and leave non-prone Operators exposed.
Trainyard (South Map)
Description: Boxcars sit stalled on two tracks that ultimately bisect out-of-bounds, with squads spawning on either end of the map to the east or west. Cross over to center and find a central fortification set up like the Market and two wooden buildings; the larger one houses another container car and a square shed at the southernmost point of Champion Hill. Both spawn areas are roughly symmetrical; each has two open containers for potential cover and another that acts as a raised platform looking at the center of the map.
Feature: Notice the ramps leading up to the abandoned boxcars on the tracks. In addition to providing some interior spaces, these boxcars offer verticality, which in turn grants phenomenal sightlines over the map in exchange for some exposure. If the minimap shows an enemy at a boxcar, be wary — they may be in it or on top of it!
Extra Life Location: X marks the spot for this Extra Life spawn — in the middle of sandbag fortifications that form an oval in the map’s center, the token sits ready for an Operator to make a potential sacrifice.
Part 3 – Buy Rounds – Buy Station Area and Upgrading Weapons
“Target locked. Dropping bomb.” —Wade Jackson, Call of Duty: Vanguard
Cash is king in Champion Hill.
Find how much Cash you currently have — $500 at the start of every match — by looking just above your current weapon and equipment at the bottom right corner of the screen. More Cash can be earned by picking up loose bundles, eliminating enemies — potentially whole squads — and winning individual Combat Rounds.
How does Cash help a squad’s chances in Champion Hill? Here is how you can spend it to upgrade your starting Loadout:
Weapons — Upgrades
Before even reaching a single Buy Station, Cash can be spent through adding attachments to your weapons.
Weapon Upgrades are the only Cash purchase that can be made at any time in Champion Hill, including a Combat Round. Beware of pressing the right D-Pad button, lest you make an impulse upgrade, but take it from this perspective: you can upgrade weapons whenever it is necessary and affordable, which could mean increasing your Loadout’s lethality right in the middle of combat when it matters most.
Each weapon has a unique “upgrade path” via Cash. As you put more Cash into a weapon, it gains a specific set of preselected attachments, which can include special ammo types and abilities for your Operator such as quicker reloads for that specific weapon.
Remember that Cash count above your current weapon? It reads out as “Upgrade Your Weapon” in a certain color, followed by a colored number, then a “/,” then the current Cash count. That colored number is how much the next upgrade would cost for your current weapon.
The color corresponds to a weapon’s rarity; all weapons start as Uncommon (Green), but as you add attachments, the weapon becomes Rare (Blue), Epic (Purple), and ultimately Legendary (Orange) as it nears its 10 — count ’em, 10 — attachment limit.
Consider this a preview of how customizable weapons are in Vanguard’s Multiplayer, and of course, the more attachments a weapon has, the more likely it is to be more versatile and stronger in combat.
Weapons — At the Buy Station
By default, every Operator starts with the same Primary Weapon and a Secondary Weapon. If you don’t like them, they can be exchanged at the designated Weapon Buy Station.
Champion Hill uses “Weapon Sets,” which consists of six weapons inclusive of the starting two. Typically, a Weapon Set will have one Pistol (your starting Secondary Weapon), an SMG, an Assault Rifle, a Shotgun, an LMG, and a Sniper Rifle.
Often, the LMG, Sniper Rifle, and Shotgun are the three most expensive weapons given their raw firepower up front. Specifically, the LMG is phenomenal for suppressive fire, especially when mounted, while the Sniper Rifle and Shotgun usually offer one-shot kill potential.
However, the Assault Rifle and SMG offer their own strengths: they are relatively inexpensive up front and have their own strong upgrade paths with additional Cash. Then there is the Pistol, a reliable backup weapon that is quick to swap to when a Primary Weapon runs dry.
When building a Loadout from the Buy Station, it is wise to play to your individual strengths. For example, if you are an aggressive player who loves close-quarter engagements, consider taking a Shotgun or SMG. Or, if your playstyle is all about landing quality shots at a distance, save up for a Sniper Rifle.
Also, it may be worth “countering” a top enemy’s choice of weapons, picking a certain gun that performs better in situations where they are weak in.
Then there is the dynamic within your Duo or Trio; it could be a good idea to coordinate Loadouts and cover a variety of scenarios. For example, a Trio can have one player focus on sniping, another running-and-gunning with a Shotgun, and the third who keeps the starting Loadout but upgrades it heavily to stay ahead of the curve.
Equipment
Outside of weapons, Operators should also consider their equipment, which can indirectly or directly help eliminate the opposition.
MK2 Frag Grenade: Cookable Fragmentation Grenade. The standard Lethal Equipment, the Frag can deal lethal damage in a short radius several seconds after its pin is pulled. “Cooking” a Frag involves holding the Lethal Grenade command (L1 by default), which pulls the pin, and releasing it after a second or two, allowing the Grenade to explode “quicker.” Just remember: once a Frag is cooked, be sure to throw it (or swap to a weapon with Triangle to stow it back).
No. 69 Stun Grenade: Slows victim’s movement and aiming. Your standard Tactical Equipment, the Stun Grenade significantly affects an opponent’s ability to fight back. Use it early and often for maximum effect, bouncing it off walls and obstructions for unexpected beginnings to an engagement.
Throwing Knife: Retrievable knife that is lethal when thrown at the body or head. Unlike previous games, the Throwing Knife in Vanguard is only lethal when it hits the head, neck, or chest, making accuracy even more key to those who use these knives only. Even if it lands in an Operator’s toe or shoulder, it still deals plenty of damage, but follow-up shots are needed for an elimination.
Gammon Bomb: Impact Grenade. This heavier equipment piece immediately explodes on impact, damaging anything within its short radius. Direct hits result in immediate kills, so aim wisely.
MK V Gas Grenade: Explodes on impact with the ground, releasing a lingering cloud of tear gas that causes slowed movement, blurred vision, and coughing. This is like the Stun Grenade but with more distracting effects to the senses rather than movement. Remember that it goes off on impact with any surface, so do not attempt to throw it too close to yourself.
S-Mine 44: Proximity-triggered explosive. This Tactical Equipment cannot directly kill an opponent at full health and armor, but it certainly will hurt. It can also be used as a device for gathering enemy positions. When it goes off, it means an enemy has tripped it by running past it.
Perks
Perks are permanent, passive upgrades to your Operator, providing them with abilities that can help them in the field through the rest of a Champion Hill match.
Demolition: Extra lethal on spawn. Thrown lethals display an indicator showing the path of the lethal. Helpful for those who use equipment early and often.
Tracker: Enemies leave behind a footprint trail. See markers at enemy death locations and hide the death markers of enemies you kill. Footprints and enemy death locations can be used to “track” enemies down, while hiding death markers prevents opponents from doing the same.
Double Time: Double the duration of Tactical Sprint. Increase crouch movement speed by 30%. A fantastic Perk for run-and-gunners, but still useful to all Operators. Faster movement means a quicker run at that Extra Life Token.
Ghost: Undetectable while moving by Spy Planes, enemy intel, and Field Mics. No need to worry about Field Mics (for now). When moving, you will remain off enemy minimaps, including when a Spy Plane is online, until you fire an unsuppressed weapon.
Survival Training: Maximized resistance to stun effects. Immune to gas. A hard counter to those Gas Grenades and a serious defense against Stun spam. A Perk that you did not think would be necessary until the Gas and Stun Grenades start flying.
High Alert: Your vision pulses when enemies outside of your view see you. This is especially helpful when squadmate communications are not accurate. Look at the screen to see a bright light in the direction of an enemy staring right at you. Find some cover whenever it pulses or prepare to fight.
Streaks
Normally reserved for those who earn a set number of kills in one life (Killstreaks) or who amass enough Score through kills and objective play (Scorestreaks), these powerful items that fundamentally turn the tide of a single round are simply known as Streaks in Champion Hill.
Armor Plate: A single piece of Armor. Fills one of three slots in your armor bar. Armor absorbs damage from explosives and bullets.
Full Armor: Full set of armor plates. Fills your armor bar to full capacity. Useful if enemies are not frequently dropping Armor Plates during Combat Rounds.
Extra Life: Gain 1 additional life for your team. More lives means more chances at surviving Champion Hill.
Spy Plane: Calls in a spy plane which reveals all enemy positions on the minimap to allies… (This automatically activates in the next match.) In Champion Hill, knowing an opponent’s movements — or lack thereof — can be key to swift one-sided victories. Look to your minimap for the frequent sweeps that show where enemies are (they appear as red dots) and go for the kill.
Deathmachine: Equips a machine gun with explosive rounds and a fixed number of bullets. Persists through death until ammo is depleted. (This automatically activates in the next match.) One of two powerful Streak, the Deathmachine is a monster that chews through enemies. Be mindful that it can be difficult to control, but in terms of power, it is better than any standard Loadout weapon. Also, don’t worry about losing it after dying; it stays with you during the entire round.
Flamenaut: Receive a flamethrower with unlimited fuel and a protective suit. Both lost on death. (This automatically activates in the next match.) A Flamenaut is essentially a one-soldier wrecking crew, able to burn down entire squads and destructible environments with ease. The protective suit is as powerful as the short-ranged Flamethrower, as it can absorb an incredible amount of damage before the soldier within it dies. Because this suit and Flamethrower are powerful, they are lost upon death.
V2 Rocket: Drops a V2 Rocket, killing all players and ending the match. Returning from Call of Duty: WWII, the V2 Rocket is a game-ending Streak that does not come cheap. An Operator must show total and utter individual dominance to scavenge enough Cash for a V2 Rocket, but once it is earned, it becomes the exclamation point that ends your opponent’s death sentence. And if you cannot earn it in Champion Hill, fret not: there is another opportunity to earn it in more traditional Vanguard Multiplayer.
Part 4 – Top-10 Tips
“Whatever we do, we do it together.” —Arthur Kingsley, Call of Duty: Vanguard
1. Teamwork, Teamwork, Teamwork. Quite possibly the most important tip for Champion Hill, Duos and Trios matches are not won by lone wolves. Use text and voice communications to keep the squad informed on enemy locations and team strategy.
2. Airfield — Control Tower Power. The Extra Life Token on Airfield spawns on the North Control Tower; getting to it requires climbing up a ladder. While on this ladder, it is possible to use a Pistol to defend yourself, which may be necessary if an opponent draws near.
3. All Maps but Airfield — Bull’s-eye. All but one map has an Extra Life Token right at its center. That means plenty of potential for crossfire. Coordinate with squadmates before making a dash for an Extra Life.
4. Dash for That Cash. Eliminations are not the only way to earn Cash; look for bundles of $100 strewn about each map and, if your squad has the maximum amount of lives, pick up that Extra Life Token for a $750 bonus.
5. Loadouts: Know Thyself, Thy Enemies, and Thy Squadmates. Winning Champion Hill comes down to Loadout building just as much as a squad’s skill in combat. But don’t just focus on your own strengths – consider what other Operators are adding to their Loadouts and work with your Duo or Trio to build a Loadout combination that can counter your rivals and put you atop Champion Hill.
6. Struggling to Survive? Focus on Weaponry. Those who struggle to survive earlier rounds should try to either upgrade their starting weapon, or purchase and invest attachments into one they are more confident with, such as a shotgun or LMG. Weapon and attachment upgrades, especially the more expensive ones, often translate into more immediate power spikes, which can be important in those first few skirmishes.
7. Remember Those Grenades. Even the best Operators forget that their Lethal and Tactical Equipment are there for supplemental damage and disorientation. Use them in tandem with weapons to maximize your chances of winning engagements. Try opening up a battle with a well-placed stun or heave a Frag across the map to where an enemy is hiding to catch them by surprise.
8. Perk Up. Perks are real value play; for no more than $1,500, you get a passive benefit like additional movement speed, extra Lethal Equipment, or even a “sixth sense” of vision pulses when enemies see you. Consider them during Buy Rounds and reap those benefits for the rest of the match, especially in the lead up to the final round.
9. Elite Strategy: Punch Above Your Weight. Confident that you can beat a squad of enemies that are showing up to battle with fully-loaded Epic or Legendary weapons? Focus on adding more one-time permanent purchases like Perks and Grenades to your Loadouts; when that enemy and their squad is eliminated from the match, they will drop their powerful weapons, which can be picked up and permanently kept in your Loadout. Just weigh the risk of using a “weaker” weapon against a more “powerful” one that will soon be yours.
10. Total WWII-Era Destruction: V2. Earning a V2 Rocket requires an individual Operator to earn tens of thousands in Cash, saving it for this guaranteed victory over upgrading their armaments as frequently as their opponents do. If you want one, keep deaths low, pick up as much Cash as possible, neutralize enemies early — for First Blood bonuses — and often, and be sure to win rounds and totally eliminate squads for large Cash bounties.
One last note: on Champion Hill, honors are given out to the top-three squads, not just the sole survivors. Even though all squads should shoot to become the one championship team, those who finish second or third should still consider their efforts a victory – it counts in the Combat Record as one, so give yourself and the squad credit for being a first or second runner-up, then get back into Champion Hill and fight to become the true victor.
The alpha is currently live now on PS4, and PS5. You can download it here if you’re interested.
COD Vanguard is scheduled for release for PC and consoles this November 5.
Stay connected to MP1st and the latest news by following us on Bluesky, X, Facebook, TikTok, YouTube, and Google News.